Введение
Быстрый старт
Торопитесь? Перейти сразу к Началу работы.
Переводы
Переводы осуществляются добровольцами и не всегда могут быть в актуальном состоянии.
- Bahasa Indonesia
- Deutsch
- Español
- Français
- Italiano
- Polski
- Português Brasileiro
- русский язык
- العربية
- فارسى
- 日本語
- 简体中文
Если вы хотите помочь с переводом руководства на другой язык, посмотрите Документацию по переводу.
Общие сведения
Anki — это программа, облегчающая процесс запоминания. Поскольку используемая техника намного эффективнее традиционных методов обучения, вы можете значительно сократить время, потраченное на заучивание материала или значительно увеличить объем выученного.
Любому, кому необходимо что-либо запоминать в своей повседневной жизни, Anki будет полезна. Так как программа не зависит от типа содержимого и поддерживает изображения, аудио, видео и научную разметку (посредством LaTeX), её возможности бесконечны. Например:
-
изучение языка
-
подготовка к экзаменам по медицине и юриспруденции
-
запоминание имен и лиц людей
-
освежить в памяти географию
-
заучивание длинных стихотворений
-
даже отработка гитарных аккордов!
В основе Anki лежат два простых принципа: активная проверка воспоминаний (англ. active recall testing) и интервальные повторения (англ. spaced repetition). Они не известны большинству учеников, несмотря на то, что в научной литературе о них пишется на протяжении многих лет. Понимание того, как они работают, позволит вам запоминать эффективнее.
Активная проверка воспоминаний
Активная проверка воспоминаний подразумевает, что каждый раз, когда мы видим вопрос — мы стараемся вспомнить на него ответ. Это противоположно пассивному обучению, когда мы читаем, смотрим или слушаем что-то без пауз на обдумывание, а знаем ли мы ответ? Исследования показывают, что активная проверка воспоминаний намного эффективней в создании хорошей памяти у человека, чем пассивное обучение. И на это есть две причины:
-
Само по себе вспоминание чего-либо, укрепляет память об этом, повышая шанс вспомнить это вновь.
-
Когда мы не можем ответить на вопрос, это говорит нам о том, что материал необходимо повторить или изучить его дополнительно.
Вы наверняка сталкивались с активной проверкой воспоминаний в школьные годы даже не осознавая этого. Когда учителя задавали вопросы после прочтения главы или давали проверочную работу, они делали это не просто, чтобы увидеть, поняли вы материал или нет. Проверяя вас, они увеличивали шанс, что вы вспомните это в будущем.
Хорошим способом использовать активную проверку воспоминаний в своей учёбе, является использование флэш-карточек (англ. flashcards) . На традиционных бумажных (картонных) карточках вы пишите вопрос на одной стороне, а ответ — на другой. Не переворачивать карточку до тех пор, пока не подумаете над ответом, позволяет вам запоминать более эффективно чем простое просматривание материала.
Используй или потеряешь
Наш мозг — эффективный механизм, и он быстро отказывается от информации, которая не кажется ему полезной. Скорее всего, вы не вспомните, что было у вас на обед в понедельник две недели назад, потому что эта информация обычно бесполезна. А вот если в тот день вы были в фантастическом ресторане и потом ещё две недели рассказывали всем вокруг о том, как это было здорово, вы, вероятно, будете помнить всё в мельчайших подробностях.
Принцип "используй или потеряешь" (англ. use it or lose it) в мозгу распространяется на всё, что мы изучаем. Если вы потратили пол дня заучивая научные термины, а потом две недели не вспоминали об этом, вы, вероятно, забудете большую часть материала. Фактически, исследования показывают, что мы забываем примерно 75% материала, полученного в течение 48 часов. Это может звучать достаточно удручающе, когда вам нужно выучить много информации.
Решение, однако, очень простое: повтор пройденного материала. Пересматривая свеже изученный материал, мы можем значительно снизить количество забытого.
Единственная проблема в том, что обычный просмотр был недостаточно удобным. Если вы используете бумажные флэш-карточки, то их легко просматривать когда их только 30, но когда число возрастёт до 300 или 3000, это станет практически невыполнимым.
Интервальное повторение
Об интервальном эффекте впервые сообщил немецкий психолог Герман Эббингауз в 1885 году. Он заметил, что мы склонны к более эффективному запоминанию, если распределим повторения по времени вместо многократных повторений за один раз. С 1930-х годов было несколько предложений по использованию интервального эффекта для улучшения обучения в которых пришли к тому, что сейчас называется интервальным повторением.
Один пример из 1972 года, когда немецкий ученый Себастьян Лейтнер популяризировал метод интервальных повторений в виде бумажных карточек. Разделяя бумажные карточки на несколько коробок в зависимости от того, удалось или нет вспомнить ответ, можно было сразу получить приблизительное представление о том, насколько хорошо была выучена карточка и когда следует снова пересмотреть её. Это было намного лучше, чем складывание всех карточек в одной коробке и в последствии такой подход стал широко использоваться в компьютерных программах, имитирующих работу с бумажными флеш-карточками. Однако это довольно грубый подход, поскольку он не может дать точной даты, когда вы должны пересмотреть что-то в следующий раз и не очень хорошо справляется с материалами различной сложности.
Наибольший вклад, за последние 30 лет, внесли авторы SuperMemo, коммерческой программы для изучения флеш-карточек методом интервального повторения. SuperMemo впервые разработала концепцию системы, которая бы отслеживала идеальное время для пересмотра материала (каждой отдельной карточки) и подстраивалась под пользователя, основываясь на результатах его производительности.
В системе интервальных повторений SuperMemo, каждый раз отвечая на вопрос, вы сообщаете программе на сколько легко удалось вспомнить ответ — забыли ли вы его полностью, сделали небольшую ошибку, с трудом вспомнили, вспомнили легко и т. д. Программа использует эти оценки чтобы определить оптимальное время для показа этого вопроса снова. И так как запоминание с каждым удачным воспоминанием становиться всё сильнее, время между показами становится всё дольше и дольше. Таким образом, после первого показа вы можете увидеть ту же карточку через 3 дня, потом через 15, 45 и т. д.
Это было революцией в обучении, поскольку это означало, что материал мог быть изучен и сохранен в памяти с абсолютным минимумом усилий. Всё это объединено в слогане SuperMemo: с интервальными повторениями вы можете забыть о забывании.
Почему Anki?
Хотя и нельзя отрицать огромного влияния SuperMemo в этой области, но и она не лишена недостатков. Программу часто критикуют за глючность и сложность в навигации. Работает только на Windows. Это закрытое программное обеспечение, то есть конечные пользователи не могут расширять его или получать доступ к исходным данным. И хотя очень старые версии доступны бесплатно, они весьма ограничены для современного использования.
Анки решает эти проблемы. Бесплатные клиенты Anki доступны на многих платформах, поэтому бедные студенты и преподаватели с ограниченным бюджетом не останутся в стороне. Anki — это програмное обеспечение с открытым исходным кодом, с процветающей библиотека дополнений, предоставленных пользователями. Она мультиплатформенна, работает на Windows, macOS, Linux/FreeBSD и некоторых мобильных устройствах. И значительно проще в использовании, чем SuperMemo.
Система интервальных повторений Anki основана на более старой версии алгоритма SuperMemo, который называется SM-2.
Примечания к платформе
Способ установки Anki и возможные проблемы, с которыми вы можете столкнуться, зависят от типа используемого компьютера.
Installing & Upgrading Anki on Windows
Requirements
Recent Anki releases require a computer running the 64 bit version of Windows 7, 8, 10 or 11.
The last Anki release that supported 32 bit Windows was Anki 2.1.35-alternate. If you're on an old machine, you can obtain the old release from the releases page.
Installing
To install Anki:
- Download Anki from https://apps.ankiweb.net
- Save the installer to your desktop or downloads folder.
- Double-click on the installer to run it. If you see an error message, please see the links on the left.
- Once Anki is installed, double-click on the new star icon on your desktop to start Anki.
Upgrading
If upgrading from Anki 2.1.6+, there is no need to uninstall the previous version first. All you need to do is close Anki if it is open, and then follow the installation steps above. Your cards will be preserved when you upgrade.
If upgrading from an Anki version before 2.1.6, or switching from the standard to the alternate version or vice versa, we recommend uninstalling the old version first, which will remove Anki's program data, but not delete your card data.
If you wish to downgrade to a previous version, please make sure you downgrade first.
Add-on Compatibility
Some add-ons have not been updated to support the latest Anki release yet. If an add-on you depend on has not been ported to the latest release yet, you may have more luck with 2.1.44 from the releases page.
Problems
If you encounter any issues when installing or starting Anki, please see the following links on the left.
Windows installation issues
Some error messages you may encounter when installing Anki:
Please also see startup issues.
"Error opening file for writing"
If closing Anki and your browser does not help, please try restarting your computer, then running the installer again.
"Windows protected your PC"
When a new Anki version is released, Windows may display a scary-looking message until it has seen enough people using the new version. To be able to proceed with app installation, please use Run anyway.
Antivirus programs may sometimes also report a false positive.
Windows startup issues
- No error, but app does not appear
- Windows updates
- Windows 7/8
- Video driver issues
- Multiple displays
- Antivirus/firewall software
- Admin access
- Multiple Anki installations present after updating
- Debugging
- If all else fails
No error, but app does not appear
Recently there have been some reports of Anki failing to appear, without any error message showing up. If you run into this situation, you can either:
- Install the latest windows-qt6 beta (try qt5 if you have add-on compatibility issues).
- Or you can try adjusting your decimal separator if it is not a period.
- Or you can try the old 2.1.35-alternate build of Anki.
Windows updates
When starting Anki, you may receive a message like the following:
- Error loading Python DLL
- The program can't start because api-ms-win.... is missing
- Failed to execute script runanki
- Failed to execute script pyi_rth_multiprocessing
- Failed to execute script pyi_rth_win32comgenpy
These errors are usually because your computer is missing a Windows update or Windows library.
Please open Windows update, and ensure your system has all updates installed. If any needed to be installed, please restart your device after installing.
Windows 7/8
On Windows 7/8, you may need to manually install extra updates. Please try:
- https://www.microsoft.com/en-us/download/details.aspx?id=48234
- https://aka.ms/vs/15/release/vc_redist.x64.exe
- http://www.catalog.update.microsoft.com/Search.aspx?q=kb4474419
- http://www.catalog.update.microsoft.com/Search.aspx?q=kb4490628
Video driver issues
Please see display issues.
Multiple displays
If you get a LoadLibrary failed with error 126, this may be caused by the toolkit Anki is built on having trouble with multiple displays
Antivirus/firewall software
Third-party software on your machine may prevent Anki from loading. You can try adding an exception to Anki, or temporarily disabling your antivirus/firewall to see if it helps.
Admin access
Some users have reported that Anki did not run for them until they right-clicked on the Anki icon and chose "Run as administrator". Anki stores all of its data in your user folder, and should not need administrator privileges, but it's something you can try if you've exhausted other options.
Multiple Anki installations present after updating
If the update process leaves you with multiple Anki installs (such as within
C:\Program Files\Anki and C:\Program Files (x86)\Anki), they may be left in a
non-working state, and Anki may refuse to start without showing an error message.
Try uninstalling all copies - you may be able to do so with the Windows Apps & features settings menu, or by running uninstall.exe in each Anki program
folder. Afterward, install Anki again.
Debugging
Starting Anki from a terminal may reveal a bit more information about some errors. After installing the latest Anki version and ensuring all Windows updates are installed, instead of running Anki directly, use Start>Run and type cmd.exe. When a console window appears, type
cd \program files\anki & anki-console
Presumably Anki will fail to open like before, but it may reveal something about what is causing the problem.
If all else fails
If you are unable to start Anki after trying the above workarounds, you have two remaining options:
- You can try running from Python.
- You can try an older Anki version built with an older toolkit, such as 2.1.35-alternate, and 2.1.15.
Windows display issues
On Windows, there are three ways of content being displayed on screen. The default is software, which is slower, but the most compatible. There are two other options that are faster: OpenGL and ANGLE. They are faster, but they may not work, or may cause display issues such as missing menubars, blank windows, and so on. Which one works best will depend on your computer.
The display driver can be adjusted via the Tools>Preferences menu. Make sure you restart Anki after adjusting it.
If you’re unable to get to Anki’s preferences screen, and restarting Anki a few times does not help, you may need to manually adjust the graphics driver. You can do this by starting cmd.exe and typing the following:
echo auto > %APPDATA%\Anki2\gldriver
The default is software; the other two drivers you can try are angle and auto.
Copy and paste issues
If you are experiencing problems with copying and pasting, please check if you are running other programs on your computer that monitor the clipboard, such as dictionary programs, clipboard managers or clipping tools. The toolkit Anki uses can have trouble when such programs are running.
Text Size
If you find the text is the wrong size, there are two environmental variables you can try:
-
ANKI_NOHIGHDPI=1 will turn off some of Qt’s high dpi support
-
ANKI_WEBSCALE=1 will alter the scale of Anki’s web views (like the deck list, study screen, etc), while leaving interface elements like the menu bar alone. Replace 1 with the desired scale, such as 1.5 or 0.75.
On Windows you can add these to a batch file to make it easier to start Anki. For example, create a file called startanki.bat on your desktop with the following text:
set ANKI_WEBSCALE=0.75
start "Anki" "C:\Program Files\Anki\anki"
After saving, you can double click on the file to start Anki with that setting.
Windows permission problems
Permission Problems
If you receive "access denied" messages, some of Anki's files may be set to read only mode, meaning Anki is not able to write to them.
To fix the problem, you can do the following:
- in the search area of the start bar, type cmd.exe and hit enter
- in the window that opens, type the following and hit enter to see your username:
whoami
- type the following, hitting enter after each line, and replacing ____ (and keeping the :F part) with your username from the previous command
cd %APPDATA%
icacls Anki2 /grant ____:F /t
That command should fix the permissions on Anki's data folder, and you should now be able to start the program.
Antivirus/Firewall/Anti-Malware
Some users have experienced "permission denied" or "readonly" errors that were caused by security software installed on their machine. You may need to add an exception for Anki, or try temporarily disabling the software to rule it out as the cause. Some users have reported that simply turning off their software did not fix the problem, and they either had to add an exception for Anki or uninstall the software.
Debugging Permission Problems
If problems persist after you've ruled out Antivirus and related programs, have performed the steps above to fix permissions, and don't use OneDrive, please run the following commands in cmd.exe, pressing enter after each one.
whoami
cd %APPDATA%
icacls Anki2 /t
Then please copy & paste or screenshot what you see, and post it to us in a support ticket.
Installing & Upgrading Anki on macOS
Requirements
Recent Anki releases require a Mac running macOS 10.13.4 or later.
The last Anki release that supported macOS 10.10 to 10.13.3 was 2.1.35-alternate. If you're on an old machine, you can obtain the old version from the releases page.
Installing
- Download Anki from https://apps.ankiweb.net
- Save the file to your desktop or downloads folder.
- Open it, and drag Anki to your Applications folder or desktop.
- Double-click on Anki in the location you placed it.
Upgrading
To upgrade, close Anki if it is open, and then follow the steps above. Drag the Anki icon into the same location you previously stored it, and when prompted, overwrite the old version. Your card data will be preserved.
Add-on Compatibility
Some add-ons have not been updated to support the latest Anki release yet. If an add-on you depend on has not been ported to the latest release yet, you may have more luck with 2.1.44 from the releases page.
Problems
If you encounter any issues when installing or starting Anki, please see the following links on the left.
Display Issues on macOS
eGPUs
If you experience blank screens when using an external graphics card on a Mac, you can ctrl+click on the Anki app, click "Get Info", and enable the "prefer eGPU" option.
Monitors with different resolutions
Please see this forum post.
Installing & Upgrading Anki on Linux
Requirements
The packaged version requires a recent 64 bit Intel/AMD Linux, and common libraries like libwayland-client and systemd. If you are on a different architecture, or a barebones Linux distro, you will not be able to use the packaged version, but you may be able to use the Python wheels instead.
On recent Ubuntu installations, please use the following before installing:
sudo apt install libxcb-xinerama0
If Anki fails to start after installing, you may be missing other libraries.
Installing
To install Anki:
- Download Anki from https://apps.ankiweb.net to your Downloads folder.
- Open a terminal and run the following commands, replacing the version number as appropriate.
tar xjf Downloads/anki-2.1.XX-linux.tar.bz2
cd anki-2.1.XX-linux
sudo ./install.sh
- You can then start Anki by typing 'anki' and hitting enter. If you encounter any issues, please see the links on the left.
Upgrading
If you were running Anki from a .deb/.rpm/etc in the past, please make sure to remove the system version before installing the package provided here.
If you're upgrading from a previous package, simply repeat the installation steps to upgrade to the latest version. Your user data will be preserved.
If you wish to downgrade to a previous version, please make sure you downgrade first.
Add-on Compatibility
Some add-ons have not been updated to support the latest Anki release yet. If an add-on you depend on has not been ported to the latest release yet, you may have more luck with 2.1.44 from the releases page.
Problems
If you encounter any issues when installing or starting Anki, please see the following links on the left.
Missing Libraries
If Anki fails to start, please run it from a terminal with anki. If it says a
library is missing, please install it and try again.
If it complains about no platform being available, please start Anki with the following command line, which should reveal a missing library:
QT_DEBUG_PLUGINS=1 anki
After installing the library with apt-get or similar, repeat the process. You may need to do this a few times before all required libraries are installed.
Display Issues on Linux
Hardware acceleration defaults to off on Linux. Enabling it in the preferences screen and restarting Anki may make Anki’s interface more responsive, but some users may experience missing menubars, blank windows or crashes when it is enabled.
You can adjust the display driver in Anki's Preferences screen. We recommend you try both settings, and see which one works best for you.
If you're unable to open Anki, you can adjust the driver in a terminal,
by writing either auto or software into
~/.local/share/Anki2/gldriver. Please note that if
you’re using nouveau, it is known to be buggy, and it only supports
software mode.
Blank Main Window
Some Linux distos have recently updated glibc. Recent versions break the web toolkit that Anki is built on, causing Anki's main window to appear blank.
There are two ways to work around this:
- Install the latest Qt6 version of Anki, which uses an updated toolkit:
- Use one of the workarounds posted on the following threads:
- https://forums.ankiweb.net/t/please-use-file-import-popup-on-startup/14695
- https://forums.ankiweb.net/t/setting-disable-seccomp-filter-sandbox-by-default-on-linux/13765
- https://forums.ankiweb.net/t/fedora-35-and-anki-2-1-47-updates-with-blank-anki-window/13431/11
Packages Distributed by Linux Distributions
We have seen a lot of issues caused by the customized versions of Anki distributed by Linux distributions:
- Anki depends on third-party libraries like Qt, and Linux distributions often substitute different versions of those libraries, without testing the impact of those changes.
- Sometimes the version of Anki they distribute is years old, or is an alpha/beta version not intended for stable release. Distributions will often disable the built-in update check as well, to prevent you from being notified of newer versions.
Compiled builds of Anki are available on https://apps.ankiweb.net. Most of the necessary libraries are included, and Anki has been tested to work with these library versions. If you're experiencing issues with your distro's version, the first thing you should try is switching to the latest packaged version we provide.
You are welcome to continue using your distro's version of Anki if you prefer, but if you run into any issues, you will need to report them to your distribution's package maintainers.
Anki not picking up GTK theme on Gnome/Linux
You can work around this issue by explicitly telling Anki what the GTK theme is. Run the following commands in a terminal:
theme=$(gsettings get org.gnome.desktop.interface gtk-theme)
echo "gtk-theme-name=$theme" >> ~/.gtkrc-2.0
echo "export GTK2_RC_FILES=$HOME/.gtkrc-2.0" >> ~/.profile
Then log out and log back into your computer, and Anki should pick up the GTK theme.
Wayland
From Anki 2.1.48, you can force Anki to use Wayland by defining ANKI_WAYLAND=1 before starting Anki. Wayland may give you better rendering across multiple displays, but it is currently off by default, due to the following issues:
- On some distros, Windows are rendered without borders.
- Bringing windows to the front is not possible, so for example, clicking on Add to reveal an existing Add Cards window will not work.
Input Methods on Linux
Fcitx
The standard Anki build includes fcitx support, but it may not work on all distributions. If you are unable to use fcitx, you may want to run Anki from Python wheels instead.
Начало работы
Установка и обновление
Пожалуйста, смотрите инструкции для своего компьютера:
Видео
Для быстрого погружения в Anki, пожалуйста, посмотрите эти вступительные видео. Некоторые из них были сделаны в предыдущей версии программы Anki, но концепция осталась та же. (На английском. С русскими или англ. субтитрами)
Если YouTube блокируется в вашей стране, вы можете скачать эти видео.
Основные понятия
Карточки
Пара вопрос-ответ называется 'карточкой'. Это название происходит от бумажных флэш-карточек (англ. flashcard) [прим. перев. Ещё встречается перевод как "дидактическая карточка"] с вопросом на одной стороне и ответом на обратной. В Anki карточка на самом деле не выглядит как бумажная карточка и когда отображается ответ, то вопрос остается видимым (по умолчанию, такое поведение может быть изменено). Например, если вы изучаете основы химии, то можете увидеть такой вопрос:
В: Химический символ кислорода?
После обдумывания и принятия решения, что ответом является О, вы нажимаете кнопку показа ответа и Anki показывает вам:
В: Химический символ кислорода?
О: О
Убедившись в своей правоте вы можете сообщить Anki, насколько легко вам было вспомнить ответ, и Anki подберёт время следующего показа карточки.
Колоды
'Колода' — это группа карточек. Вы можете размещать карточки в разных колодах для изучения отдельных частей вашей коллекции карточек, вместо того чтобы учить все сразу. У каждой колоды могут быть разные настройки, например, сколько новых карточек показывать каждый день или как долго следует ждать до следующего показа карточки.
Колоды могут содержать другие колоды, что позволяет вам организовать их в древовидную структуру. В Anki используется "::" как показатель разных уровней. Так в названии колоды "Китайский::Ханзи" отмечается, что колода "Ханзи" является частью колоды "Китайский".
Чтобы собирать колоды в дерево, вы можете либо именовать их с "::" между каждым уровнем, либо мышкой перетаскивать и отпускать из списка колод. Колоды, вложенные в другие колоды (в названии которых хоть раз встречается "::") часто называют 'подколодами', а колоды верхнего уровня иногда называют 'суперколодами' или 'родительскими'.
Anki запускается с единственной колодой под названием "по умолчанию" (англ. default); все карточки, которые каким-то образом отделились от других колод, будут попадать сюда. Anki скроет колоду по умолчанию, если в ней нет карт и вы добавили другие колоды. Или же вы можете переименовать эту колоду и использовать ее для других карточек.
Колоды больше всего подходят для объединения широких категорий карточек, а не для таких конкретных тем, как "пищевые глаголы" или "урок 1". Более подробную информацию об этом см. в разделе правильное использование колод.
Информацию о том, как колоды влияют на порядок отображения в них карточек, смотрите в разделе порядок отображения
Записи и поля
При создании флэш-карточек часто бывает необходимо сделать более одной карточки, относящихся к одной информации. Например, если вы изучаете французский и узнаёте, что слово "bonjour" означает "здравствуйте", то вы можете создать одну карточку, которая показывает вам "bonjour" и просит вас вспомнить "здравствуйте", а другую карточку, которая показывает вам "здравствуйте" и просит вас вспомнить "bonjour". Одна карточка проверяет вашу способность узнавать иностранное слово, а другая — умение воспроизвести его.
Используя бумажные флэш-карточки, у вас только один вариант — написать всю информацию дважды, по одному разу на каждой карточке. Некоторые компьютерные программы облегчают создание флэш-карточек, предоставляя возможность перевернуть лицевую и оборотную стороны карточки. Эта ситуация получше, чем с бумажными карточками, но есть два основных недостатка:
-
Поскольку подобные программы отслеживают вашу способность к распознаванию и воспроизведению информации по-отдельности, карточки, как правило, не показываются в оптимальное время, что означает, что вы либо забываете больше чем хотелось, либо занимаетесь больше, чем необходимо.
-
Поменять местами вопрос и ответ можно только в том случае, если вам нужна в точности одинаковая информация на обеих сторонах. Это означает, что вы не можете, например, отобразить дополнительную информацию на обратной стороне каждой карточки.
Anki решает эти проблемы, позволяя вам разделить содержимое ваших карточек на отдельные части информации. Вы можете указать Anki, какие части информации вы хотите на каждой из карточек и Anki позаботится о создании их для вас, а так же обновит их если вы сделаете какие-либо изменения в будущем.
Представьте, что мы хотим поучить французский словарь и добавлять номер страницы на обратной стороне каждой карточки. Мы хотим, чтобы наши карточки выглядели так:
В: Bonjour
О: Здравствуйте
   Страница #12
И:
В: Здравствуйте
О: Bonjour
   Страница #12
В этом примере у нас есть три, связанных между собой, части информации: французское слово, русское значение и номер страницы. Объединив их вместе, они будут выглядеть вот так:
Французский: Bonjour
Русский: Здравствуйте
Страница: 12
В Anki эта связанная информация называется 'запись', а каждый фрагмент информации называется 'поле'. Так что мы можем сказать, что у этого типа записи имеется три поля: французский, русский и страница.
Чтобы добавлять или изменять поля, нажмите кнопку "Поля…" в процессе добавления или изменения записи. Дополнительные сведения о полях см. в разделе Настройка полей.
Типы карточек
Для того чтобы Anki создавала карточки на основе наших записей, мы должны предоставить ей шаблон (англ. blueprint) в котором указано, какие поля должны быть показаны на лицевой или обратной стороне каждой карточки. Этот шаблон и называется 'типом карточки'. Каждый тип записи может иметь одну или несколько типов карточек; когда вы добавляете запись, Anki создаст по одной карточке для каждого типа карточек.
У каждого типа карточки есть два 'шаблона', один для вопроса и один для ответа. В приведённом выше французском примере мы хотели, чтобы карта распознавания выглядела так:
В: Bonjour
О: Здравствуйте
   Страница #12
Для этого мы можем задать шаблоны вопросов и ответов следующим образом:
В: {{Французский}}
О: {{Русский}}<br>
   Страница #{{Страница}}
Заключая название поля в двойные фигурные скобки, мы указываем Anki заменять этот раздел фактической информацией из этого поля. Всё, что не окружено фигурными скобками остаётся в неизменном виде на каждой карточке. (Например, мы не должны вводить "Страница #" в поле "Страница" при добавлении материала — он добавляется автоматически на каждую карточку.) <br> — это специальный код, который указывает Anki перейти к следующей строке; дополнительные сведения доступны в разделе Шаблоны карточек.
Создание шаблонов карточек работает схожим образом:
В: {{Французский}}
О: {{Русский}}<br>
   Страница #{{Страница}}
Однажды создав тип карточки, в дальнейшем, каждый раз добавляя новую запись, карточка будет создаваться на основе этого типа карточки. Типы карточек упрощают содержание в единообразном состоянии оформления ваших карточек и могут значительно облегчить добавление информации.
Для добавления и изменения типов карточек, нажмите кнопку "Карточки…" во время добавления или изменения записи. Дополнительные сведения о типах карточек см. в разделе Шаблоны карточек.
Типы записей
Anki позволяет создавать различные типы записей для различного материала. У каждого типа записи имеется свой набор полей и типов карточек. Хорошей идеей будет создание отдельных типов записей для каждой обширной темы которую вы изучаете. Для этого, в приведённом выше французском примере, можно создать тип записи с названием "Французский". Если бы мы хотели изучать столицы, мы могли бы создать для этого отдельный тип записи, с такими полями, как "Страна" и "Столица".
Когда Anki проверяет наличие дубликатов, то сравнивает только другие заметки того же типа. Так, если вы добавите столицу под названием "Апельсин" используя тип записи столицы, то вы не увидите сообщение о дубликате, когда прийдёт время учить как сказать "апельсин" по-французски.
При создании новой коллекции [прим. перев. профиля], Anki автоматически добавляет некоторые стандартные типы записей в неё. Эти типы записей предназначены облегчить работу с Anki для новых пользователей, но в дальнейшем рекомендуется определить свои собственные типы записей для того материала который вы изучаете.
Основная Содержит поля Лицо и Оборот, и будет создавать одну карточку. Текст напечатанный в поле Лицо будет отображаться на лицевой стороне карточки, а текст который вы введёте в поле Оборот будет отображаться на обратной стороне карточки.
Это лицо→оборот карточка, а карточка оборот→лицо при необходимости. Для этого
есть третье поле под названием "Добавить обратную". Если в это поле будет
введён какой-либо текст [прим. перев. Любой текст, чтобы эта функция
сработала], обратная карточка будет создана. Дополнительные сведения об этом
см. в разделе Шаблоны карточекОсновная (с обратной карточкой)
Как Основная, только создаёт две карточки для введённого вами текста: одну из
лицо→оборот и одну из оборот→лицо.
Основная (обратная по выбору) Это лицо→оборот карточка, а карточка оборот→лицо при необходимости. Для этого есть третье поле под названием "Добавить обратную". Если в это поле будет введён какой-либо текст [прим. перев. Любой текст, чтобы эта функция сработала], обратная карточка будет создана. Дополнительные сведения об этом см. в разделе Шаблоны карточек.
Основная (введите ответ) По сути, это Основная, с дополнительным текстовым полем на лицевой стороне, где вы можете ввести свой ответ, после переворачивания на оборот, введённый вами текст будет проверен и сравнён с ответом. Дополнительные сведения об этом см. в разделе Проверка своего ответа.
Задание с пропусками
Тип записи который облегчает выбор текста и превращение его в обучающие пропуски
(англ. cloze deletion) (например, "Человек приземлился на Луну в […] году"
→ "Человек приземлился на Луну в 1969 году"). Дополнительные сведения см. в
разделе заполнение пропусков
Чтобы добавить свои типы записей и изменить существующие, можно использовать Инструменты → Управлять типами записей из главного окна Anki.
Записи и типы записей являются общими для всей коллекции, а не ограничиваются отдельной колодой. Это означает, что вы можете использовать несколько различных типов записей в определенной колоде или иметь разные карточки, сгенерированные на основе одной записи в разных колодах. При добавлении записей с помощью окна Добавить, можно выбрать какой использовать тип записи и какую колоду, и эти варианты полностью независимы друг от друга. Можно также изменить тип записи для некоторых записей после того, как они уже были созданы.
Коллекция
Ваша "коллекция" — это все материалы, хранящиеся в Анки — ваши карточки, записи, колоды, типы записей, настройки колод и так далее.
Общие колоды
Вы можете посмотреть видео про Общие колоды и Основы повторений на YouTube.
Самый простой способ начать заниматься с Anki — скачать колоду карточек которой кто-то поделился:
-
Нажмите кнопку "Скачать колоду" ниже списка колод.
-
Когда вы нашли интересующую вас колоду, нажмите кнопку "Скачать", чтобы скачать пакет колоды.
-
Дважды щелкните по скачанному пакету, чтобы загрузить его в Anki, или импортируйте его нажав Файл→Импортировать.
Пожалуйста, обратите внимание, что в настоящее время нет возможности добавлять общие колоды непосредственно в вашу учетную запись AnkiWeb. Вы должны импортировать их с помощью настольной версии программы, а затем синхронизировать их для передачи в AnkiWeb.
Создание собственной колоды является наиболее эффективным способом изучения сложной темы. Такие предметы, как языки и науки, не могут быть поняты просто запоминанием фактов — они требуют объяснений и контекста, чтобы учить их эффективно. Более того, сама информация заставляет вас решать, каковы ключевые моменты, что приведет к лучшему пониманию.
Изучая язык, для вас может быть заманчивой возможность скачать длинный список слов и их переводов, но так вы выучите язык не лучше, чем запоминая научные уравнения выучите астрофизику. Чтобы учиться правильно, нужны учебники, учителя или практика в реальных условиях (англ. exposure to real-world sentences).
Не запоминай, если не понимаешь.
--SuperMemo
Большинство общих колод созданы людьми, которые изучат материал вне Anki — по учебникам, на уроках, по телевизора и т.д. Они выбирают интересные для себя моменты из того, что они учат, и добавляют их в Anki. Они не утруждают себя добавлением справочной информации или пояснений к карточкам, поскольку они уже понимают материал. Поэтому, когда кто-то другой скачивает их колоду и пытается ее использовать, для них это оказывается очень трудным поскольку отсутствует необходимый информационный фон и пояснения.
Это не значит, что общие колоды бесполезны — просто для сложных предметов их следует использовать как 'дополнение' к внешнему материалу, а не как его 'замена'. Если вы изучаете учебник ABC, а кто-то поделится колодой с основными идеями из ABC — это отличный способ сэкономить немного время. И для простых предметов, которые по сути являются списком фактов, таких как названия столиц или фактов из викторин в пабе (англ. pub quiz trivia), вам, вероятно, не нужен внешний материал. Но если вы попытаетесь изучать сложные темы без внешнего материала, то, вероятно, вас ждет неутешительный результат.
Изучение
- Колоды
- Общие сведения об изучении
- Вопросы
- Изучаемые/Переучиваемые карточки
- Повторяемые карточки
- Подсчёт очереди
- Фактор нечёткости
- Правка и ещё
- Порядок отображения
- Связанные и отложенные
- Клавиатурные сокращения
- Отставание
Когда вы нашли колоду которая вам нравится или добавили несколько записей самостоятельно — пора начинать обучение.
Колоды
Заучивание карточек в Anki осуществляется в пределах выбранной в настоящий момент колоды и любых подколод которые она содержит.
На экране колод ваши колоды представлены в виде списка. В нем присутствуют три числовых столбца. 'Новые' — это количество новых карточек, которые подготовлены к заучиванию в этот день. Вторая колонка отображает количество карточек изучаемых в данный момент. 'К просмотру' — это количество ожидающих повторения.
При нажатии на колоду она станет 'текущей колодой' и Anki переключится на экран изучения. Вы можете вернуться к списку колод, чтобы изменить выбранную в данный момент колоду в любое время, нажав на 'Колоды' в верхней части главного окна. (Можно также использовать действие Учить колоду для выбора новой колоды с клавиатуры или нажать клавишу s для изучения выбранной в данный момент колоды.)
Можно нажать кнопку шестерёнки справа от колоды, чтобы переименовать или удалить колоду, изменить её параметры или экспортировать её.
Общие сведения об изучении
После нажатия на колоду для изучения, вы увидите экран на котором показано сколько карточек у вас запланировано на сегодня. Это называется экраном 'обзора колоды'. Карточки разделены на три типа:
-
Новые — это карточки, которые вы скачали или добавлены вручную, но никогда раньше не изучали.
-
Изучаемые — это карточки, которые недавно были показаны первый раз и сейчас в процессе изучения.
-
Повторяемые — это карточки, которые были изучены ранее, а теперь должны быть пересмотрены, чтобы вы их не забыли.
Чтобы начать сеанс заучивания, нажмите кнопку Учить. Anki будет показывать вам карточки до тех пор, пока запланированные на сегодня карточки не закончатся.
В процессе изучения можно вернуться к обзору, нажав клавишу s на клавиатуре.
Вопросы
При показе карточки, сперва показывается только вопрос. Подумав над ответом, нажмите либо кнопку Показать ответ, либо пробел на клавиатуре — будет показан ответ. Это нормально, если вам потребуется немного времени, чтобы вспомнить ответ, но, как правило, если вы не можете ответить в течение 10 секунд, скорее всего, лучше сдаться и показать ответ, чем продолжать пытаться его вспомнить.
Когда покажется ответ, вам следует сравнить его с тем который вы придумали и сообщить Anki, на сколько точно вы запомнили. Если вы не уверены в точности сравнения ответов, вы можете указать Anki предлагать вам набирать ответ с клавиатуры, а не просто показывать его вам.
Изучаемые/Переучиваемые карточки
При изучении новых карточек или переучивании забытых, Anki будет показывать карточки по одному или нескольку раз, чтобы помочь вам их запомнить. Каждый такой показ называется 'обучающий шаг'. По умолчанию установлено два шага: 1 минута и 10 минут. Количество и продолжительность таких шагов можно изменить в настройках колоды.
В процессе обучения доступны черыре кнопки оценки:
Снова — перемещает карточку обратно к первому шагу.
Трудно — повторяет текущий шаг после первого шага и является средним между Хорошо и Легко на первом шаге.
Хорошо — перемещает карточку на следующий шаг. Если карточка была на последнем шаге, то она переводится [прим. перев. из изучаемой] в повторяемую карточку (она 'выпускник' (англ. graduate)). По умолчанию, карточка достигнув конца обучающих шагов, будет показана снова на следующий день, затем задержки между показами будут увеличиваться (смотрите следующий раздел).
Легко — немедленно переводит карточку в повторяемую, даже если остались ещё шаги. По умолчанию, карточка будет показана повторно через 4 дня, затем задержки между показами будут увеличиваться. В планировщике версии v1 кнопка "Легко" не будет показана, если вы в режиме переучивания, и это задаст тот же интервал, что и "Хорошо". В версии v2 планировщика+ когда карточки в режиме переучивания, кнопка "Легко" увеличивает интервал на 1 день.
Когда карточки показываются в первый раз, они начинают на первом шаге. Это означает, что ответив Хорошо на карточке с первого раза покажет её ещё раз через 10 минут, а первый шаг в 1 минуту будет пропущен. Если вы нажмёте Снова, карточка вернется через 1 минуту.
Вы можете использовать клавиши 1, 2, 3 и 4 на клавиатуре, для выбора конкретной кнопки, где 1 — это Снова. Нажатие клавиши Space или Enter выбирает Хорошо.
Если нет других карточек для показа, Anki снова покажет изучаемые карточки, даже если их задержка полностью не закончилась. Если вы предпочитаете ждать всю обучающую задержку, вы можете изменить поведение в Настройки>Расписание>Лимит опережения.
Повторяемые карточки
Когда карточка уже была изучена и готова к повторению, есть четыре кнопки для оценки ответа:
Снова — помечает ваш ответ как неверный и указывает Anki чаще показывать карточку в будущем. Карточка считается 'забытой' (англ. lapsed). Смотрите раздел забытые для получения более подробной информации о том, как обрабатываются забытые повторения.
Трудно — по умолчанию, показывает карточку с чуть большей задержкой, чем в прошлый раз и указывает Anki чаще показывать карточку в будущем.
Хорошо — сообщает Anki, что последняя задержка была примерно правильной и лёгкость карточки не нуждается в уменьшении или увеличении. При значении лёгкости по умолчанию, задержка перед следующим показом карточки будет примерно в 2,5 раза дольше чем в предыдущий раз, так что если бы вы в прошлый раз ждали 10 дней, чтобы увидеть карточку, то следующая задержка составит около 25 дней.
Легко — сообщает Anki, что вы сочли задержку слишком короткой. Карточка будет запланирована дальше, чем при ответе 'Хорошо' и в последствии Anki будет включать её в расписание чуть реже. Поскольку 'Легко' быстро увеличивает задержку, она лучше всего подходит для, действительно, самых простых карточек. Обычно вместо этого ответа, стоит использовать ответ 'Хорошо'.
Как и с изучаемыми карточками, вы можете использовать клавиши 1, 2, 3 и 4 на клавиатуре, для выбора ответа. Нажатие клавиши Space или Enter выбирает Хорошо.
Узнать больше о работе алгоритма вы можете в разделе Настройки колоды и ЧаВо.
Подсчёт очереди
Когда показывается только вопрос, Anki показывает в нижней части экрана три числа вроде 12 + 34 + 56. Они обозначают новые карточки, изучаемые карточки и повторяемые карточки. Если вы предпочитаете не видеть этих цифр, вы можете отключить их в настройках Anki.
В планировщике версии 1, считается количество просмотров необходимое для завершения всех карточек в этой очереди, а не количество самих карточек. Если задано несколько шагов для забытых карточек, то число увеличивается более чем на один, если вы не справились с карточкой, так как она должна быть показана несколько раз.
В планировщике версии 2, считается количество карточек, так что число всегда увеличивается на один, независимо от оставшихся шагов.
Когда отображается ответ, Anki выводит примерное время следующего показа карточки над каждой кнопкой. Если вы предпочитаете не видеть оценок, вы можете отключить их в настройках Anki.
Фактор нечёткости
Когда вы выбираете кнопку сложности на повторяемой карточке, Anki также применяет небольшое количество случайной "нечёткости" чтобы карточки, которые были показаны в одно и то же время и получившие одинаковый рейтинг не держались постоянно вместе и всегда появлялись для повторения в один и тот же день. Эта нечёткость в кнопках ответа появляется, когда включён планировщик версии 3, поэтому, если вы используете предудущую версию и замечаете некоторое несоответствие между тем, что вы выбираете, и теми интервалами, которые на самом деле получают ваши карточки, причина, вероятно в этом.
Изучаемым карточкам также даётся дополнительная задержка в 5 минут, чтобы они не всегда появляются в одном и том же порядке, но на кнопках ответа это никак не сказывается. Отключить эту функцию невозможно.
Правка и ещё
Для изменения текущей заметки нажмите кнопку Правка в левом нижнем углу. Завершив редактирование вы будете возвращены к обучению. Экран редактирования работает аналогично экрану добавления записи
В правом нижнем углу экрана просмотра находится кнопка Ещё. Эта кнопка предоставляет несколько других операций, которые можно выполнить с текущей карточкой или записью:
-
Поставить флаг: Ставит цветную метку на карточку или убирает её. Метки будут отображаться во время изучения, а в окне Обзора можно выполнять поиск отмеченных карточек. Это полезно, когда вы хотите выполнить некоторое действие над карточкой позднее, например, когда вернётесь домой, поискать какое-нибудь слово. Если вы используете версию Anki 2.1.45+, вы также можете переименовывать флаги в браузере
-
Отложить карточку / запись: Прячет карточку или все карточки записи от показа до следующего дня. (Если вы хотите вернуть карточки раньше, нажмите кнопку "вернуть" в окне обзора колоды.) Это полезно, если в данный момент вы не можете ответить на карточку или хотите вернуться к ней в другой раз. Откладывание также может произойти автоматически для карточек одной записи.
Со старым планировщиком, если карточки находятся в процессе изучения на момент их откладывания, то сперва они перемещаются обратно в очередь новых карточек или очередь повторяемых перед тем как быть отложенными.
Однако с планировщиком 2.1, откладывание карточек не сбрасывает шаги изучения карточки.
-
Задать срок: Помещает карточки в очередь повторений, и откладывает их срок выполнения до определённой даты.
-
Исключить карточку / запись: Прячет карточку или все карточки записи от показа до тех пор, пока они не будут включены вручную (нажатием кнопки исключения–включения в окне обзора). Это полезно, если вы не хотите повторять запись некоторое время, но не хотите удалять её. Со старым планировщиком, если карточки находятся в процессе изучения на момент их исключения, то сперва они перемещаются обратно в очередь новых карточек или очередь повторяемых перед исключением.
Однако с планировщиком 2.1, исключение карточек не сбрасывает шаги изучения карточки.
-
Настройки: Редактировать настройки текущей колоды.
-
Сведения о карточке: Отображает статистику по карточке.
-
Отметить запись: Добавляет текущей записи метку "marked", что позволяет легко найти её в обозревателе. Это схоже с отметкой отдельных карточек, только работает с метками (англ. tag), поэтому, если в записи есть несколько карточек, все они появятся в поиске по метке marked. Большинству пользователей лучше использовать флаги.
-
Удалить запись: Удаляет запись и все её карточки.
-
Повторное воспроизведение аудио: Если у карточки есть аудио на лицевой или оборотной стороне, воспроизводит его повторно.
-
Аудио на паузу: приостанавливает воспроизведение звука.
-
Аудио -5с / +5с: Переход назад / вперед на 5 секунд в воспроизводимом аудио.
-
Записать свой голос: Запись с микрофона для проверки произношения. Это временная запись и она исчезнет при переходе к следующей карточке. Если вы хотите добавить на карточку постоянную аудио-запись, то это можно сделать в окне редактирования.
-
Воспроизвести свой голос: Воспроизвести предыдущую запись своего голоса (предположительно, после показа ответа).
Порядок отображения
В процессе изучения показываются карточки из текущей выбранной колоды и всех колод, которые она содержит. Таким образом, если вы выберете колоду "Французский", подколоды "Французский::Словарь" и "Французский::Моя тетрадь::Урок 1" также будут показаны.
То как Anki выбирает карточки из колод, зависит от используемого алгоритма:
-
С планировщиком версии 1, когда в колоде есть подколоды, карточки будут появляться из каждой колоды по очереди.
-
С планировщиком версии 2, когда в колоде есть подколоды, карточки для повтора берутся сразу со всех дочерних колод. Лимит показов дочерних колод игнорируется — применяется только лимит колоды, на которую вы щелкнули.
-
С планировщиком версии 3 лимит каждой подколоды также учитывается и вам не прийдётся просматривать карточки в том порядке, в котором идут колоды. Дополнительную информацию смотрите в разделе руководства Настройки колод.
По умолчанию новые карточки Anki выбирает из расположенных в алфавитном порядке колод. Так в приведенном выше примере, сначала вы увидите карточки из колоды "Моя тетрадь", затем "Словарь", и, наконец "Французский". Это можно использовать для управления порядком отображения карточек, помещая карточки с большим приоритетом в колоды, находящиеся выше по списку. При компьютерной сортировке текста по алфавиту, символ "-" идёт перед буквами алфавита, а "~" — после них [прим. перев. но перед русскими. В русских (кириллических) названиях колод вместо "~" можно использовать знак "№"]. Значит, вы можете назвать колоду "-Французский", чтобы она отображалась первой, а другую — "№Словарь", чтобы отображать её после всего остального.
Новые и повторяемые карточки выбираются отдельно, и Anki не будет ждать, пока закончатся обе очереди, прежде чем перейти к следующей колоде, так что возможно, вам будут показываться новые карточки из одной колоды и повторяемые из другой, и наоборот. Если вам это не подходит, нажимайте непосредственно на колоду которую хотите изучать, а не на родительские колоды.
Изучаемые карточки, поскольку у них, так сказать, жесткий временной режим, выбираются из всех колод одновременно и отображаются в порядке своей очереди.
Для управления порядком, в котором появляются карточки из определённой колоды, или изменения порядка показа новых карточек из упорядоченного в произвольный, смотрите в настройках колоды. Ещё более точно настроить порядок появления новых карточек можно в обозревателе.
Связанные и отложенные
Вспомним из основ, что Anki может создавать более одной карточки из каждой записи, например, карточки лицо→оборот и оборот→лицо, или два разных заполнения пропусков из одного текста. Такие карточки, относящиеся к одной записи, называются 'связанными'.
Отвечая на одну из связанных карточек, Anki может предотвращать показ связанных с ней карточек в этот же день, автоматически 'откладывая' их. Отложенные карточки скрыты от повтора до тех пор, пока на часах не наступит следующий день или вы вручную не вернёте их при помощи кнопки "Вернуть" отображаемой внизу экрана обзора колоды. Anki отложит связанные карточки даже если они находятся в разных колодах (например, если вы используете функцию подмена колоды).
Вы можете включить откладывание в окне настроек колоды — отдельно для новых и повторяемых карточек.
Anki будет откладывать связанные карточки, которые являются новыми или повторяемыми. Изучаемые карточки не будут скрываться, поскольку время для них имеет существенное значение. С другой стороны, заучивая карточку которая является изучаемой, любые новые/повторяемые карточки будут отложены.
Примечание: Карточка не может быть одновременно отложена и исключена. Исключение отложенной карточки вернёт её из отложенных. Откладывание исключённой карточки ни работает в Anki 2.1.49+, тогда как в более ранних версиях он включает карту.
Клавиатурные сокращения
Для большинства общих действий в Anki имеются клавиатурные сокращения. Многие из них легко обнаружить в элементах интерфейса: рядом с пунктами меню отображаются их клавиатурные сокращения, а наведение курсора мыши на кнопку, как правило, показывает её клавиатурное сокращение во всплывающей подсказке.
Во время обучения, как Пробел так и клавиша Enter покажут ответ. Когда покажется ответ, вы можете использовать клавиши Пробела
или Enter для выбора кнопки Хорошо. Для выбора конкретной кнопки лёгкости можно использовать клавиши 1–4. Многим людям удобно отвечать на большинство карточек клавишей Пробела и держать один палец на цифре 1, на случай если забыли ответ.
Пункт "Учить колоду" в меню Инструменты позволяет вам быстро переключиться на другую колоду с помощью клавиатуры. Вызвать его можно клавишей '/'. Будучи открытым, в нём отображаются все ваши колоды и строка фильтра сверху. По мере ввода символов, Anki будет отображать только те колоды которые соответствуют введённым вами символам. Можно добавить пробел для разделения нескольких условий поиска, и Anki покажет только колоды, соответствующие всем условиям. Так "яп 1" или "ок1 яп" в обоих случаях будут соответствовать колоде "Японский::Урок1".
Отставание
Если вы отстали от графика повторения, Anki отдаст предпочтение карточкам, которые ждут дольше всех. Она выбирает карточки ожидающие дольше всех и показывает их в случайном порядке до тех пор, пока не будет исчерпан суточный лимит показов. Такой порядок гарантирует, что никакие карточки не останутся в состоянии вечного ожидания, однако это означает, что если вы добавите новых карточек, то не увидите их до тех пор, пока не наверстаете отставание.
Если вы хотите изменить порядок просмотра просроченных карточек, вы можете это сделать с помощью создания фильтрованной колоды.
Отвечая на карточки, некоторое время находившиеся в ожидании, Anki учитывает эту задержку при определении времени следующего показа карточки. Дополнительную информацию смотрите в разделе про алгоритм интервальных повторений Anki.
Добавление/изменение
- Добавление карточек и записей
- Добавление типа записи
- Настройка полей
- Changing Deck / Note Type
- Organizing Content
- Editing Features
- Заполнение пропусков
- Inputting Foreign Characters and Accents
- Unicode Normalization
Добавление карточек и записей
Вспомним из основ, что в Anki мы добавляем записи, а не карточки, и уже из них Anki создаёт нам карточки. Нажав 'Добавить' в главном окне появится окно добавления записей.
В верхней левой части окна отображается текущий тип записи. Если он не указан как "Basic", то, возможно, вы добавили некоторые типы записей вместе со скачанными когда-то общими колодами. Следующий текст предполагает, что выбран тип "Basic".
В верхней правой части окна отображается колода, в которую будут добавляться карточки. Если хотите добавить карточки в новую колоду, вы можете нажать на названии колоды и затем нажать "Добавить".
Под типом записи вы увидите несколько кнопок и области под названиями "Лицевая" (англ. Front) и "Обратная" (англ. Back). Лицевая и Обратная области называются 'полями' и вы можете добавлять, удалять и переименовывать их, щелкнув по кнопке "Поля…" выше.
Под полями находится другая область под названием "Метки". Метки — это ярлыки, которые вы можете прикрепить к вашим записям, чтобы упростить их организацию и поиск. Вы можете оставить метки пустыми, если хотите, или добавить одну или несколько из них. Метки разделяются знаком пробела. Если в метках указано
словарь уточнить_у_репетитора
…то у записи которую вы добавите будет две метки.
При вводе лицевого и обратного текста, вы можете нажать кнопку "Добавить" или сочетание клавиш Ctrl+Enter (Command+Enter на Mac) для добавления записи в коллекцию. После чего, карточка будет создана и добавлена в выбранную вами колоду. Если вы захотите изменить добавленную карточку, вы можете нажать кнопку истории для поиска недавно добавленных карточек в обзоре.
Дополнительные сведения о кнопках между типом записи и полями см. в разделе редактор.
Проверка на дубликаты
Anki проверяет первое поле на уникальность, поэтому предупредит, если вы внесёте две карточки в Лицевом поле которых будут одинаковые данные, например, "яблоко". Проверка уникальности ограничивается текущим типом записи, так, если вы изучаете несколько языков, две карточки с одинаковой Лицевой стороной не будут отображаться как повторы, пока у вас будут разные типы записей для каждого языка.
Anki не проверяет на повторы другие поля автоматически из соображений эффективности, но в обозревателе есть функция "Найти повторы", которую можно запускать периодически.
Эффективное обучение
Разным людям нравится повторять по-разному, но есть некоторые общие концепции, о которых следует помнить. Отличное введение — эта статья на сайте SuperMemo. В частности:
-
Будь проще: Чем короче карточки, тем легче их повторять. У вас может возникнуть соблазн включить много информации "на всякий случай", но повторения станут мучительными очень быстро.
-
Не запоминай без понимания: Если вы изучаете язык, старайтесь избегать больших списков слов. Лучше всего изучать языки в контексте, что означает видеть использование этих слов в предложении. Так же представьте, что вы изучаете компьютерный курс. Пытаясь запомнить горы сокращений, вам будет очень трудно добиться прогресса. Но уделив время на понимание ключевых принципов, стоящих за этими сокращениями намного упростит их изучение.
Добавление типа записи
В то время как основных типов записей достаточно для карточек с одним словом или фразой с каждой стороны, как только вы захотите добавлять больше одного фрагмента информации на лицевую или обратную стороны, лучше начать делить эту информацию на большее количество полей.
Вы можете подумать: "но я хочу лишь одну карточку, так почему я не могу просто добавить аудио, картинку, подсказку и перевод в Лицевом поле?" Если вы предпочитаете делать именно так, то это нормально. Но недостатком этого подхода является то, что вся информация оказывается склеенной. Если вы захотите отсортировать ваши корточки по подсказке, то не сможете этого сделать т.к. эта информация будет смешана с другим содержимым. Вы также не сможете делать такие вещи как, например, перенос аудио с лицевой стороны на оборотную без кропотливого копирования и вставки его для каждой отдельной записи. Держа информацию в разных полях, вы значительно облегчаете настройку внешнего вида ваших карточек в дальнейшем.
Чтобы создать новый тип записи, выберите Инструменты → Управлять типами записей в главном окне Anki. Затем нажмите "Добавить", чтобы добавить новый тип записи. Теперь вы увидите другой экран, в котором предлагается выбрать тип записи как основу нового типа. "Добавить" означает, создание нового типа на основе того, который изначально идёт с Anki. "Клонировать" означает, создание нового типа на основе того, который ужу находится в вашей коллекции. Например, если вы уже создали тип французский словарь, то, возможно вы захотите клонировать его при создании типа немецкий словарь.
После выбора ОК вам будет предложено назвать новый тип. Тема материала, который вы сейчас изучаете, будет хорошим выбором, например, такие вещи как "Японский", "Викторина" и так далее. Выбрав имя, закройте окно Типы записей и вы вернётесь в окно добавления.
Настройка полей
Для настройки полей, нажмите кнопку "Поля…" при добавлении или изменении записи, или когда тип записи выделен в окне Управления типами записей.
Вы можете добавлять, удалять или переименовывать поля, нажимая соответствующие кнопки. Чтобы изменить порядок, в котором поля отображаются в этом диалоговом окне и окне добавления записей, можно использовать кнопку переместить, которая запрашивает порядковый номер, который должно иметь поле. Так, если вы хотите переместить поле на место первого поля, введите "1".
Не используйте в качестве имен полей 'Tags', 'Type', 'Deck', 'Card' или 'FrontSide', так как это специальные поля и они не будут работать правильно.
Опции в нижней части экрана позволяют изменять различные свойства полей, которые будут использоваться при добавлении и редактировании карточек. Здесь вы не настраиваете то, что появляется на карточках при повторении; для этого смотрите раздел шаблоны.
Шрифт в редакторе позволяет настроить шрифт и размер шрифта при редактировании записей. Это полезно, если вы хотите сделать неважную информацию меньше или увеличить размер иностранных символов, которые трудно прочитать. Сделанные здесь изменения не влияют на то, как отображаются карточки при повторении: для этого смотрите раздел шаблоны. Однако, если у вас включена функция "с вводом ответа", текст, который вы вводите, будет использовать заданный здесь размер шрифта. (Информацию о том, как изменить реальный вид шрифта при вводе ответа, смотрите в разделе проверка своего ответа.)
Сортировать по этому полю… указывает Anki отображать это поле в столбце Поле сортировки обозревателя. Это можно использовать для сортировки карточек по этому полю. Одновременно только одно поле может быть полем сортировки.
Направление текста справа-налево полезно при изучении языка который отображает текст справа-налево (англ. right to left (RTL)), например, арабский или иврит. В настоящее время этот параметр управляет только редактированием; чтобы убедиться, что текст отображается правильно во время повторения, необходимо настраивать свой шаблон.
After you have added fields, you will probably want to add them to the front or back of your cards. For more information on that, please see the templates section.
Changing Deck / Note Type
While adding, you can click on the top left button to change note type, and the top right button to change deck. The window that opens up will not only allow you to select a deck or note type, but also to add new decks or manage your note types.
Organizing Content
Правильное использование колод
Decks are designed to divide your content up into broad categories that you wish to study separately, such as English, Geography, and so on. You may be tempted to create lots of little decks to keep your content organized, such as "my geography book chapter 1", or "food verbs", but this is not recommended, for the following reasons:
-
Lots of little decks may mean you end up seeing cards in a recognizable order. On older scheduler versions, new cards can only be introduced in deck order. And if you were planning to click on each deck in turn (which is slow), you will end up seeing all the "chapter 1" or "food verb" reviews together. This makes it easier to answer the cards, as you can guess them from the context, which leads to weaker memories. When you need to recall the word or phrase outside Anki, you won't always have the luxury of being shown related content first!
-
While less of a problem than it was in earlier Anki versions, adding hundreds of decks may cause slowdowns, and very large deck trees with thousands of items can actually break the display of the deck list in Anki versions before 2.1.50.
Using Tags
Instead of creating lots of little decks, it's a better idea to use tags and/or fields to classify your content. Tags are a useful way to boost search results, find specific content, and keep your collection organized. There are many ways of using tags and flags effectively, and thinking in advance about how you want to use them will help you decide what will work best for you.
Some people prefer using decks and subdecks to keep their cards organized, but using tags have a big advantage over decks for that: you can add several tags to a single note, but a single card can only belong to one deck, which makes tags a more powerful and flexible categorization system than decks in most cases. You can also organize tags in trees in the same way as you can do for decks.
For example, instead of creating a "food verbs" deck, you could add those cards to your main language study deck, and tag the cards with "food" and "verb". Since each card can have multiple tags, you can do things like search for all verbs, or all food-related vocabulary, or all verbs that are related to food.
You can add tags from the Edit window and from the Browser, and you can also add, delete, rename, or organize tags there. Please note that tags work at note level, which means that when you tag a card that has siblings, all the siblings will be tagged as well. If you need to tag a single card, but not its siblings, you should consider using flags instead.
Using Flags
Flags are similar to tags, but they will appear during study in the review window, showing a colored flag icon on the upper right area of the screen. You can also search for flagged cards in the Browse screen, rename flags from the browser and create filtered decks from flagged cards, but unlike tags, a single card can have only one flag at a time. Another important difference is that flags work at card level, so flagging a card that have siblings won't have any effect on the card's siblings.
You can flag / unflag cards directly while in review mode (by pressing CTRL + 1-7 on Windows or CMD + 1-7 on Mac) and from the Browser.
The "Marked" Tag
Anki treats a tag called "marked" specially. There are options in the review screen and browse screen to add and remove the "marked" tag. The review screen will show a star when the current card's note has that tag. And cards are shown in a different color in the browse screen when their note is marked.
Note: Marking is mainly left around for compatibility with older Anki versions; most users will want to use flags instead.
Using Fields
For those who like to stay very organized, you can add fields to your
notes to classify your content, such as "book", "page", and so on. Anki
supports searching in specific fields, which means you can do a search
for "book:my book" page:63 and immediately find what you're looking
for.
Custom Study and Filtered Decks
Using custom study and filtered deck you can create temporary decks out of search terms. This allows you to review your content mixed together in a single deck most of the time (for optimum memory), but also create temporary decks when you need to focus on particular material, such as before a test. The general rule is that if you always want to be able to study some content separately, it should be in a normal deck; if you only occasionally need to be able to study it separately (for a test, when under a backlog, etc.), then filtered decks created from tags, flags, marks or fields are better.
Editing Features
The editor is shown when adding notes, editing a note during reviews, or browsing.
On the top left are two buttons, which open the fields and cards windows.
On the right are buttons that control formatting. Bold, italic and underline work like they do in a word processing program. The next two buttons allow you to subscript or superscript text, which is useful for chemical compounds like H2O or simple mathematical equations like x2.
The rubber eraser button clears any formatting in the currently selected text — including the colour of the text, whether the selected text is bold, etc.
The next three buttons allow creating lists, text alignment and text indent. Then, there are two buttons to allow you to change text colour.
The […] button is visible when a cloze note type is selected.
You can use the paper-clip button to select audio, images, and videos from your computer's hard drive and attach them to your notes. Alternatively, you can copy the media onto your computer's clipboard (for instance, by right-clicking an image on the web and choosing 'Copy Image') and paste it into the field that you want to place it in. For more information about media, please see the media section.
The microphone icon allows you to record from your computer's microphone and attach the recording to the note.
The Fx button shows shortcuts to add MathJax or LaTeX to your notes.
The </> button allows editing the underlying HTML of a field.
Anki 2.1.45+ supports adjusting sticky fields directly from the editing screen. If you click on the pin icon on the right of a field, Anki will not clear out the field's content after a note is added. If you find yourself entering the same content into multiple notes, you may find this useful. On previous Anki versions, sticky fields were toggled from the Fields screen.
Most of the buttons have shortcut keys. You can hover the mouse cursor over a button to see its shortcut.
When pasting text, Anki will keep most formatting by default. If you hold down the Shift key while pasting, Anki will strip most of the formatting. Under Preferences, you can toggle "Paste without shift key strips formatting" to modify the default behaviour.
Заполнение пропусков
'Cloze deletion' is the process of hiding one or more words in a sentence. For example, if you have the sentence:
Canberra was founded in 1913.
…and you create a cloze deletion on "1913", then the sentence would become:
Canberra was founded in [...].
Sometimes sections that have been removed in this fashion are said to be 'occluded'.
For more information on why you might want to use cloze deletion, see Rule 5 here.
Anki provides a special cloze deletion type of note, to make creating clozes easy. To create a cloze deletion note, select the Cloze note type, and type some text into the "Text" field. Then drag the mouse over the text you want to hide to select it, and click the […] button. Anki will replace the text with:
Canberra was founded in {{c1::1913}}.
The "c1" part means that you have created one cloze deletion on the sentence. You can create more than one deletion if you'd like. For example, if you select Canberra and click […] again, the text will now look like:
{{c2::Canberra}} was founded in {{c1::1913}}.
When you add the above note, Anki will create two cards. The first card will show:
Canberra was founded in [...].
…on the question, with the full sentence on the answer. The other card will have the following on the question:
[...] was founded in 1913.
You can also elide multiple sections on the same card. In the above example, if you change c2 to c1, only one card would be created, with both Canberra and 1913 hidden. If you hold down Alt (Option on a Mac) while creating a cloze, Anki will automatically use the same number instead of incrementing it.
Cloze deletions don't need to fall on word boundaries, so if you select "anberra" rather than "Canberra" in the above example, the question would appear as "C[…] was founded in 1913", giving you a hint.
You can also give yourself hints that don't match the text. If you replace the original sentence with:
Canberra::city was founded in 1913
…and then press […] after selecting "Canberra::city", Anki will treat the text after the two colons as a hint, changing the text into:
{{c1::Canberra::city}} was founded in 1913
When the card comes up for review, it will appear as:
[city] was founded in 1913.
For information on testing your ability to type in a cloze deletion correctly, please see the section on typing answers.
Please note that overlapping clozes are not supported. For example, the following field is invalid:
{{c1::Canberra was {{c2::founded}}}} in 1913
If you need to create clozes from overlapping text, add another Text field to your cloze, add it to the template, and then when creating notes, paste the text into two separate fields, like so:
Text1 field: {{c1::Canberra was founded}} in 1913

Text2 field: {{c2::Canberra}} was founded in 1913
The default cloze note type has a second field called Extra, that is shown on the answer side of each card. It can be used for adding some usage notes or extra information.
The cloze note type is treated specially by Anki, and cannot be created based on a regular note type. If you wish to customize it, please make sure to clone the existing Cloze type instead of another type of note. Things like formatting can be customized, but it is not possible to add extra card templates to the cloze note type.
Inputting Foreign Characters and Accents
All modern computers have built-in support for typing accents and foreign characters, and multiple ways to go about it. The method we recommend is by using a keyboard layout for the language you want to learn.
Languages with a separate script like Japanese, Chinese, Thai, and so on, have their own layouts specific to that language.
European languages that use accents may have their own layout, but can often by typed on a generic "international keyboard" layout. These work by typing the accent, then the character you want accented - e.g. an apostrophe (') then the letter a (a) gives á.
To add the international keyboard on Windows machines, please see http://www.techlanguage.com/tips/us_international.html
To add it on Macs, please see http://www.macworld.com/article/1147039/os-x/accentinput.html
Keyboards for a specific language are added in a similar way, but we can not cover them all here. For more information, please try searching Google for "input Japanese on a mac", "type Chinese on Windows 10", and so on.
If you are learning a right-to-left language, there are lots of other things to consider. Please see this page for more information.
The toolkit on which Anki is built has trouble dealing with a few input methods, such as holding down keys to select accented characters on macOS, and typing characters by holding down the Alt key and typing a numeric code on Windows.
Unicode Normalization
Text like á can be represented in multiple ways on a computer, such as
using a specific code for that symbol, or by using a standard a and then
another code for the accent on top. This causes problems when mixing input
from different sources, or using different computers - if your computer
handles keyboard input in one form, but the content is stored in a different
form, it will not match when searching, even though the end result appears
identical.
To ensure content can easily be found in searches, Anki normalizes the text to a standard form. For most users this process is transparent, but if you are studying certain material like archaic Japanese symbols, the normalization process can end up converting them to a more modern equivalent.
If you want character variants preserved, the following in the debug console will turn off normalization:
mw.col.conf["normalize_note_text"] = False
Any content added after that will remain untouched. The trade-off is that you may find it difficult to search for the content if you're switching between operating systems, or pasting content from mixed sources.
Шаблоны карточек
Card templates tell Anki which fields should appear on the front and back of your card, and control which cards will be generated when certain fields have text in them. By adjusting your card templates, you can alter the design and styling of many of your cards at once.
Card templates are covered in some of the intro videos:
The Templates Screen
You can modify card templates by clicking the "Cards..." button inside the editing screen.
For older Anki versions, on the top left is the front template, on the bottom left is the back template, and in between them is the card styling section. For Anki versions 2.1.28+ the front, back, and styling are no longer shown at the same time. You can switch between them with Ctrl+1, Ctrl+2, and Ctrl+3.
In Anki, templates are written in HTML, which is the language that web pages are written in. The styling section is CSS, which is the language used for styling web pages.
On the right is a preview of the front and back of the currently selected card. If you opened the window while adding notes, the preview will be based on the text you had typed into the Add Notes window. If you opened the window while editing a note, the preview will be based on the content of that note. If you opened the window from Tools → Manage Note Types, Anki will display each field’s name in parentheses in place of content.
At the top right of the window is an Options button that gives you options to rename or reorder the cards, as well as the following two options:
-
The 'Deck Override' option allows you to change the deck that cards generated from the current card type will be placed into. By default, cards are placed into the deck you provide in the Add Notes window. If you set a deck here, that card type will be placed into the deck you specified, instead of the deck listed in the Add Notes window. This can be useful if you want to separate cards into different decks (for instance, when studying a language, to put production cards in one deck and recognition cards in another). You can check which deck the cards are currently going to by choosing Deck Override again.
-
The 'Browser Appearance' option allows you to set different (perhaps simplified) templates for display in the Question and Answer columns of the browser; see browser appearance for more information.
Field Replacements
- Basic Replacements
- Newlines
- Text to Speech
- Специальные поля
- Hint Fields
- Dictionary Links
- HTML Stripping
- Right To Left Text
- Media & LaTeX
- Проверка своего ответа
Basic Replacements
The most basic template looks something like this:
{{Front}}
When you place text within curly brackets, Anki looks for a field by that name, and replaces the text with the actual content of the field.
Field names are case sensitive. If you have a field named Front,
writing {{front}} will not work properly.
Your templates are not limited to a list of fields. You can also include arbitrary text on your templates. For example, if you’re studying capital cities, and you’ve created a note type with a “Country” field, you might create a front template like this:
What's the capital city of {{Country}}?
The default back template will look something like this:
{{FrontSide}}

<hr id=answer>

{{Back}}
This means “show me the text that’s on the front side, then a divider line, and then the Back field”.
The 'id=answer' part tells Anki where the divider is between the question and the answer. This allows Anki to automatically scroll to the spot where the answer starts when you press 'show answer' on a long card (especially useful on mobile devices with small screens). If you don’t want a horizontal line at the beginning of the answer, you can use another HTML element such as a paragraph or div instead.
Newlines
Card templates are like web pages, which means a special command is required to create a new line. For example, if you wrote the following in the template:
one
two
In the preview, you’d actually see:
one two
To add a new line, you need to add a <br> code to the end of a line, like so:
one<br>
two
The br code stands for "(line) br(eak)".
The same applies for fields. If you want to display two fields, one on each line, you would use
{{Field 1}}<br>
{{Field 2}}
Text to Speech
This feature requires Anki 2.1.20, or AnkiMobile 2.0.56. AnkiDroid does not currently support this method.
To have Anki read the Front field in a US English voice, you can place the following in your card template:
{{tts en_US:Front}}
On Windows, macOS, and iOS, Anki will use the OS’s built in voices. On Linux, no voices are built in, but voices can be provided by add-ons, such as this one.
To see a list of all available languages/voices, place the following on your card template:
{{tts-voices:}}
If there are multiple voices that support your chosen language, you can specify desired voices in a list, and Anki will choose the first available voice. For example:
{{tts ja_JP voices=Apple_Otoya,Microsoft_Haruka:Field}}
This would use Otoya when on an Apple device, and Haruka when on a Windows PC.
Specifying a different speed is possible in some TTS implementations:
{{tts fr_FR speed=0.8:SomeField}}
Both speed and voices are optional, but the language must be included.
On a Mac, you can customize the available voices:
-
Open the System Preferences screen.
-
Click on Accessibility.
-
Click on Speech.
-
Click on the system voice dropdown, and choose Customize.
Some voices sound better than others, so experiment to choose the one you prefer. Please note that the Siri voice can only be used by Apple apps. Once you’ve installed new voices, you’ll need to restart Anki for the new voices to become available.
On Windows, some voices like Cortana can not be selected, as Microsoft does not make those voices available to other applications.
On a cloze note type, you can make Anki read only the elided sections
using the cloze-only filter, like so:
{{tts en_US:cloze-only:Text}}
The cloze-only filter is supported in Anki 2.1.29+ and AnkiMobile 2.0.65+.
Специальные поля
There are some special fields you can include in your templates:
The note's tags: {{Tags}}

The type of note: {{Type}}

The card's deck: {{Deck}}

The card's subdeck: {{Subdeck}}

The type of card ("Forward", etc): {{Card}}

The content of the front template
(only valid in back template): {{FrontSide}}
FrontSide will not automatically play any audio that was on the front side of the card. If you wish to have the same audio play automatically on both the front and back of the card, you’ll need to manually include the audio fields on the back as well.
As with other fields, special field names are case sensitive - you must use
{{Tags}} rather than {{tags}} for example.
Hint Fields
It’s possible to add a field to the front or back of a card, but make it hidden until you explicitly show it. We call this a 'hint field'. Before adding a hint, please bear in mind that the easier you make it to answer a question in Anki, the less likely you are to remember that question when you encounter it in real life. Please have a read about the 'minimum information principle' on http://www.supermemo.com/articles/20rules.htm before proceeding.
First, you’ll need to add a field to store the hint in if you have not already. Please see the fields section if you’re not sure how to do this.
Assuming you’ve created a field called MyField, you can tell Anki to include it on the card but hide it by default by adding the following to your template:
{{hint:MyField}}
This will show a link labeled “show hint”; when you click it, the content of the field will be displayed on the card. (If MyField is empty, nothing will be shown.)
If you show the hint on the question and then reveal the answer, the
hint will be hidden again. If you want to have the hint always revealed
when the answer is shown, you will need to remove {{FrontSide}} from
your back template and manually add the fields you wish to appear.
It is not currently possible to use a hint field for audio — the audio will play regardless of whether you’ve clicked on the hint link.
If you want to customize the appearance or behaviour, you’ll need to implement the hint field yourself. We can not provide any support for doing so, but the following code should get you started:
{{#Back}}
<a class=hint href="#"
onclick="this.style.display='none';document.getElementById('hint4753594160').style.display='inline-block';return false;">
Show Back</a><div id="hint4753594160" class=hint style="display: none">{{Back}}</div>
{{/Back}}
Dictionary Links
You can also use field replacement to create dictionary links. Imagine you’re studying a language and your favourite online dictionary allows you to search for text using a web URL like:
http://example.com/search?q=myword
You could add an automatic link by doing the following in your template:
{{Expression}}

<a href="http://example.com/search?q={{Expression}}">check in dictionary</a>
The template above would allow you to search for each note’s expression by clicking on the link while reviewing. There is a caveat however, so please see the next section.
HTML Stripping
Like templates, fields are stored in HTML. In the dictionary link example above, if the expression contained the word "myword" without any formatting, then the HTML would be the same: "myword". But when you include formatting in your fields, extra HTML is included. If "myword" was bolded for example, the actual HTML would be "<b>myword</b>".
This can present a problem for things like dictionary links. In the above example, the dictionary link would end up being:
<a href="http://example.com/search?q=<b>myword</b>">check in dictionary</a>
The extra characters in the link would likely confuse the dictionary site, and you’re likely not to get any matches.
To solve this, Anki provides the ability to strip formatting from fields when they are replaced. If you prefix a field name with text:, Anki will not include any formatting. So a dictionary link that worked even with formatted text would be:
<a href="http://example.com/search?q={{text:Expression}}">check in dictionary</a>
Right To Left Text
If you’re using a language that reads from right to left, you’ll need to adjust the template like so:
<div dir=rtl>{{FieldThatHasRTLTextInIt}}</div>
Media & LaTeX
Anki does not scan templates for media references, because it is slow to do so. This has implications for including media on the template.
Static Sounds/Images
If you wish to include images or sounds on your cards that are the same for every card (eg, a company logo at the top of each card):
-
Rename the file so it starts with an underscore, eg "_logo.jpg". The underscore tells Anki that the file is used by the template and it should be exported when sharing the deck.
-
Add a reference to the media on your front or back template, like:
<img src="_logo.jpg">
Field References
Media references to fields are not supported. They may or may not display during review, and will not work when checking for unused media, importing/exporting, and so on. Examples that won’t work:
<img src="{{Expression}}.jpg">

[sound:{{Word}}]

[latex]{{Field 1}}[/latex]
Instead, you should include the media references in the field. Please see the importing section for more information.
Проверка своего ответа
You can watch a video about this feature on YouTube.
The easiest way to check your answer is to click "Basic" at the top left of the card adding screen, and select "Basic (type in the answer)".
If you have downloaded a shared deck and would like to type in the answer with it, you can modify its card template. If it has a template like:
{{Native Word}}

{{FrontSide}}

<hr id=answer>

{{Foreign Word}}
To type in the foreign word and check if you are correct, you need to edit your front template so that it looks like this:
{{Native Word}}
{{type:Foreign Word}}
Note that we have added type: in front of the field we want to
compare. Since FrontSide is on the back of the card, the type answer box
will appear on the back as well.
When reviewing, Anki will display a text box where you can type in the answer, and upon hitting Enter or showing the answer, Anki will show you which parts you got right and which parts you got wrong. The text box’s font size will be the size you configured for that field (via the “Fields” button when editing).
This feature does not change how the cards are answered, so it’s still up to you to decide how well you remembered or not.
Only one typing comparison can be used on a card. If you add the above text multiple times, it will not work. It also only supports a single line, so it is not useful for comparing against a field that is comprised on multiple lines.
Anki uses a monospaced font for the answer comparison so that the “provided” and “correct” sections line up. If you wish to override the font for the answer comparison, you can put the following at the bottom of your styling section:
code#typeans { font-family: "myfontname"; }
Which will affect the following HTML for the answer comparison:
<code id=typeans>...</code>
Advanced users can override the default type-answer colors with the css classes 'typeGood', 'typeBad' and 'typeMissed'. AnkiMobile supports 'typeGood' and 'typeBad', but not 'typeMissed'.
If you wish to override the size of the typing box and don’t want to
change the font in the Fields dialog, you can override the default
inline style using !important, like so:
#typeans { font-size: 50px !important; }
It is also possible to type in the answer for cloze deletion cards. To
do this, add {{type:cloze:Text}} to both the front and back
template, so the back looks something like this:
{{cloze:Text}}
{{type:cloze:Text}}
{{Extra}}
Note that since the cloze type does not use FrontSide, this must be added to both sides on a cloze note type.
If there are multiple sections elided, you can separate the answers in the text box with a comma.
Type answer boxes will not appear in the "preview" dialog in the browser. When you review or look at the preview in the card types window, they will display.
Card Generation
- Reverse Cards
- Card Generation & Deletion
- Selective Card Generation
- Conditional Replacement
- Blank Back Sides
- Limitations in Older Anki Versions
- Adding Empty Notes
- Cloze Templates
Reverse Cards
You can watch a video about reversing cards on YouTube.
If you want to create cards that go in both directions (e.g., both “ookii”→“big” and “big”→“ookii”), you have several options. The simplest is to select the “Basic (and reversed card)” built-in note type. This will generate two cards, one in each direction.
If you want to generate reverse cards for only some of your material (perhaps you only want to take the time to study reverses for the most important material, or some of your cards don’t make sense reversed), you can select the “Basic (optional reversed card)” note type. This note type generates a forward-only card when you fill in only the first two fields; if you additionally enter something in the “Add Reverse” field (like a 'y'), Anki will generate a reverse card as well. The contents of this field will never be displayed on a card.
Card Generation & Deletion
Anki will not create cards with empty front sides. Thus if “My Field” was empty, and one card’s front template included only that field, the card would not be created.
If no cards can be created because all of the cards would have empty front sides, then the Add Notes window will warn you and not allow the note to be added until at least one card would be generated.
When you edit a previously added note, Anki will automatically create extra cards if they were previously blank but no longer are. If your edits have made some cards blank when they previously were not, however, Anki will not delete them immediately, as that could lead to accidental data loss. To remove the empty cards, go to Tools → Empty Cards in the main window. You will be shown a list of empty cards and be given the option to delete them.
Because of the way that card generation works, it is not possible to manually delete individual cards, as they would just end up being recreated the next time the note was edited. Instead, you should make the relevant conditional replacement fields empty and then use the Empty Cards option.
Anki does not consider special fields or non-field text for the purposes of card generation. Thus if your front template looked like the following, no card would be generated if Country was empty:
Where is {{Country}} on the map?
Selective Card Generation
Sometimes you may want to generate extra cards for only some of your material, such as testing your ability to recall the most important words of a set. You can accomplish this by adding an extra field to your note, and adding some text into it (such as "1") on the notes you want the extra card. Then in the card template, you can make the card’s creation depend on that field being non-empty. For more information on this, please see the conditional replacement section below.
Conditional Replacement
It is possible to include certain text, fields, or HTML on your cards only if a field is empty or not empty. An example:
This text is always shown.

{{#FieldName}}
    This text is only shown if FieldName has text in it
{{/FieldName}}

{{^FieldName}}
    This text is only shown if FieldName is empty
{{/FieldName}}
A real life example is only showing a label if the field is not empty:
{{#Tags}}
    Tags: {{Tags}}
{{/Tags}}
Or say you want to display a specific field in blue on the front of your card if there are extra notes on the back (perhaps the fact that there are notes serves as a reminder that you should spend more time thinking about the answer). You can style the field as follows:
{{#Notes}}
    <span style="color:blue;">
{{/Notes}}

{{FieldToFormat}}

{{#Notes}}
    </span>
{{/Notes}}
You can also use conditional replacement to control which cards are generated. This works since Anki will not generate cards which would have a blank front side. For example, consider a card with two fields on the front:
{{Expression}}
{{Notes}}
Normally a card would be generated if either the expression or notes field had text in it. If you only wanted a card generated if expression was not empty, then you could change the template to this:
{{#Expression}}
    {{Expression}}
    {{Notes}}
{{/Expression}}
And if you wanted to require both fields, you could use two conditional replacements:
{{#Expression}}
    {{#Notes}}
        {{Expression}}
        {{Notes}}
    {{/Notes}}
{{/Expression}}
Keep in mind that this only works when you place the conditional replacement code on the front of the card; if you do this on the back, you will simply end up with cards with a blank back side. Similarly, since this works by checking if the front field would be empty, it is important to make sure you wrap the 'entire' front side in the conditional replacement; for instance, the following would not work as expected:
{{#Expression}}
    {{Expression}}
{{/Expression}}
{{Notes}}
Blank Back Sides
Card generation only looks at the front side of the card. For example, if you have a front template:
{{Field 1}}
and a back template:
{{Field 2}}
Then a card will be generated if Field 1 is non-empty. If Field 2 is empty, the card will still be generated, and you will get a blank back side.
If you wish to avoid a blank back side, you will need to place a required field on the front template as a conditional, like so:
{{#Field 2}}
    {{Field 1}}
{{/Field 2}}
This will ensure the card is generated only if both Field 2 and Field 1 are non-empty.
Limitations in Older Anki Versions
The following limitations do not apply to Anki 2.1.28+ and AnkiMobile 2.0.64+.
Older Anki versions cannot use negated conditionals for card generation. For example, on Anki 2.1.28, the following would add a card if a field called AddIfEmpty is empty, and Front is non-empty:
{{^AddIfEmpty}}
    {{Front}}
{{/AddIfEmpty}}
On earlier Anki versions, the negated conditional is ignored, and card generation will depend only on Front being non-empty.
Mixing AND and OR conditions can also cause problems on older versions. For example, the following ("add the card if A OR B OR C is non-empty") is fine:
{{A}}
{{B}}
{{C}}
And the following ("add the card if A AND B AND C are non-empty") is fine:
{{#A}}
    {{#B}}
        {{#C}}
            {{A}}
        {{/C}}
    {{/B}}
{{/A}}
But the following ("add the card if A OR (B AND C) are non-empty") will not work properly:
{{A}}
{{#B}}
    {{#C}}
        {{B}}
    {{/C}}
{{/B}}
Adding Empty Notes
When you add a new note in Anki 2.1.28+ and AnkiMobile 2.0.64+, if the card templates and note fields combine to produce no cards, a blank card will be created using the first template. This allows you to add material even if it's incomplete, and modify it or the template later to make it valid. If you don't wish to keep an empty note, you can remove it with the Empty Cards function.
On older Anki versions, Anki refuses to add or import a note if no cards would be generated.
Cloze Templates
Please see the cloze deletion section for background info.
The cloze note type functions differently from regular note types. Instead of a customizable number of card types, it has a single type which is shared by all cloze deletions on a note.
As mentioned in the card generation section above, generation of regular cards depends on one or more fields on the question being non-empty. Cloze deletion note types are generated differently:
-
Anki looks on the front template for one or more cloze replacements, like {{cloze:FieldName}}.
-
It then looks in the FieldName field for all cloze references, like {{c1::text}}.
-
For each separate number, a card will be generated.
Because card generation functions differently for cloze deletion cards, {{cloze:…}} tags can not be used with a regular note type - they will only function properly when used with a cloze note type.
Conditional generation provides a special field so you can check which card you are rendering. If you wanted to display the "hint1" field on the first cloze, and "hint2" field on the second cloze for example, you could use the following template:
{{cloze:Text}}

{{#c1}}
    {{Hint1}}
{{/c1}}

{{#c2}}
    {{Hint2}}
{{/c2}}
Styling & HTML
- Card Styling
- Image Resizing
- Field Styling
- Audio Replay Buttons
- Text Direction
- Other HTML
- Browser Appearance
- Platform-Specific CSS
- Installing Fonts
- Night Mode
- Fading and Scrolling
- Javascript
Card Styling
You can watch a video about styling cards on YouTube. The video shows Anki 2.0’s interface, but the concepts are largely the same.
In between the front and back template in the Cards screen is the card styling area. In that section, you can change the background color of the card, the default font, the text alignment, and so on.
The standard options available to you are:
font-family
The name of the font to use on the card. If your font has spaces in it
like "MS Unicode", then you need to surround the font name in double
quotes as in this sentence. It is also possible to use multiple fonts on
one card; for information on that, please see below.
font-size
The size of the font in pixels. When changing it, make sure you leave px
at the end.
text-align
Whether the text should be aligned in the center, left, or right.
color
The color of the text. Simple color names like 'blue', 'lightyellow',
and so on will work, or you can use HTML color codes to select arbitrary
colors. Please see this webpage for more
information.
background-color
The color of the card background.
Any CSS can be placed in the styling section – advanced users may wish to do things like add a background image or gradient, for example. If you’re wondering how to get some particular formatting, please search the web for information about how to do it in CSS, as there is a great deal of documentation available.
The styling is shared between all cards, which means that when you make an adjustment it will affect all cards for that note type. It is also possible to specify card-specific styling, however. The following example will use a yellow background on all cards except the first one:
.card {
  background-color: yellow;
}
.card1 {
  background-color: blue;
}
Image Resizing
Anki shrinks images to fit the screen by default. You can change this by adding
the following to the bottom of your styling section (outside of the default
.card { ... }):
img {
  max-width: none;
  max-height: none;
}
AnkiDroid sometimes has trouble scaling images to fit the
screen. Setting maximum
image dimensions using css should fix this, but seems to be ignored as of
AnkiDroid 2.9. A fix is to append !important to each style directive, for
example:
img {
  max-width: 300px !important;
  max-height: 300px !important;
}
If you try to change the style for images and find that the star that appears on marked cards is affected (for instance, it becomes way too large), you can target it with the following:
img#star {
  ...;
}
You can explore the styling of cards interactively by using Chrome:
https://addon-docs.ankiweb.net/porting2.0.html#webview-changes
Field Styling
The default styling applies to the whole card. You can also make certain fields or part of the card use a different font, color, and so on. This is particularly important when studying foreign languages, as Anki will sometimes be unable to correctly display characters unless an appropriate font has been chosen.
Say you have an “Expression” field, and you want to give it the OSX Thai font “Ayuthaya”. Imagine your template already reads:
What is {{Expression}}?

{{Notes}}
What we need to do is wrap the text we want to style in some HTML. We will put the following in front of the text:
<div class=mystyle1>
And the following behind it:
</div>
By wrapping the text like the above, we tell Anki to style the wrapped text with a custom style called “mystyle1”, which we will create later.
Thus if we wanted the entire “What is …?” expression to use the Thai font, we would use:
<div class=mystyle1>What is {{Expression}}?</div>

{{Notes}}
And if we wanted only the expression field itself to use the Thai font, we’d use:
What is <div class=mystyle1>{{Expression}}</div>?

{{Notes}}
After we’ve edited the template, we now need to move to the Styling section between the templates. Before editing it, it should look something like:
.card {
  font-family: arial;
  font-size: 20px;
  text-align: center;
  color: black;
  background-color: white;
}
Add your new style to the bottom, so it looks like:
.card {
  font-family: arial;
  font-size: 20px;
  text-align: center;
  color: black;
  background-color: white;
}

.mystyle1 {
  font-family: ayuthaya;
}
You can include any styling you want in the style. If you wanted to increase the font size too, you’d change the mystyle1 section to look like:
.mystyle1 {
  font-family: ayuthaya;
  font-size: 30px;
}
It’s also possible to bundle custom fonts with your deck, so you don’t need to install them on your computer or mobile device. Please see the installing fonts section for more info.
Audio Replay Buttons
When audio or text to speech is included on your cards, Anki will show buttons you can click on to replay the audio.
If you prefer not to see the buttons, you can hide them in the preferences screen.
You can customize their appearance in your card styling, for example, to make them smaller and colored, you could use the following:
.replay-button svg {
  width: 20px;
  height: 20px;
}
.replay-button svg circle {
  fill: blue;
}
.replay-button svg path {
  stroke: white;
  fill: green;
}
Text Direction
If you use a language that is written right-to-left, such as Arabic or Hebrew,
you can add the CSS direction property to the .card section for correct display during review:
.card {
  direction: rtl;
}
This will change the direction of the entire card. You can change the direction of only certain fields by wrapping their references in some HTML:
<div dir="rtl">{{Front}}</div>
To change the direction of fields in the editor, please see the editing section.
Other HTML
Your templates can contain arbitrary HTML, which means that all the layout possibilities used on internet web pages can also be used on your cards. Things like tables, lists, images, links to external pages and so on are all supported. With tables for example, you could change the layout so that the front and back of a card appear on the left and right instead of the top and bottom.
Covering all of HTML’s features is outside the scope of this manual, but there are plenty of good introductory guides to HTML available on the web if you’d like to learn more.
Browser Appearance
If your card templates are complex, it may be difficult to read the question and answer columns (called "Front" and "Back") in the card list. The "browser appearance" option allows you to define a custom template to be used only in the browser, so you can include only the important fields and change the order if you desire. The syntax is the same as in standard card templates.
Platform-Specific CSS
Anki defines some special CSS classes that allow you to define different styling for different platforms. The example below shows how to vary the font depending on where you’re reviewing:
.win .jp {
  font-family: "MS Mincho";
}
.mac .jp {
  font-family: "Hiragino Mincho Pro";
}
.linux .jp {
  font-family: "Kochi Mincho";
}
.mobile .jp {
  font-family: "Hiragino Mincho ProN";
}
And in the template:
<div class=jp>{{Field}}</div>
For different iOS devices, you can use '.iphone' and '.ipad'.
You can also use properties like .gecko, .opera, and .ie to select particular browsers when using AnkiWeb. Please see http://rafael.adm.br/css_browser_selector/ for a full list of options.
Installing Fonts
If you’re using Anki on a work or school computer where you don’t have permission to install new fonts, or you’re using Anki on a mobile device, it’s possible to add fonts directly to Anki.
To add a font to Anki, it must be in the TrueType format. TrueType fonts have a filename ending in .ttf, such as "Arial.ttf". Once you’ve located a TrueType font, we’ll need to add it to the media folder:
-
Rename the file, adding an underscore at the start, so it becomes like "_arial.ttf". Adding an underscore will tell Anki that this file will be used on a template, and should not be deleted when checking for unused media.
-
In your computer’s file browser, go to your Anki Folder, and then a folder called "User 1" (or your profile name if you’ve renamed/added profiles).
-
Inside the folder, you should see a folder called collection.media. Drag the renamed file to that folder.
After that, we need to update the template:
-
Click Add at the top of the main screen, and then select the note type you want to change with the top left button.
-
Click Cards.
-
In the styling section, add the following text to the bottom (after the last "}" character), replacing "_arial.ttf" with the name of the file you copied into your media folder:
@font-face {
  font-family: myfont;
  src: url("_arial.ttf");
}
Only change the "arial" part, not the "myfont" part.
After that, you can either change the font for the entire card, or for individual fields. To change the font for the entire card, simply locate the font-family: line in the .card section and change the font to "myfont". To change the font for only certain fields, please see the Field Styling instructions above.
Please make sure the filenames match exactly. If the file is called arial.TTF and you write arial.ttf in your card templates, it will not work.
Night Mode
You can customize the way templates appear when night mode is enabled in the preferences screen.
If you wanted a lighter grey background, you could use something like:
.card.nightMode {
  background-color: #555;
}
If you have a 'myclass' style, the following would show the text in yellow when night mode is enabled:
.nightMode .myclass {
  color: yellow;
}
Fading and Scrolling
Anki will automatically scroll to the answer by default. It looks for a HTML element with id=answer, and scrolls to that. You can place the id on a different element to adjust the scrolling position, or remove the id=answer to turn off scrolling.
The question side of a card fades in by default. If you wish to adjust this delay, you can place the following at the top of your front card template:
<script>qFade=100; if (typeof anki !== 'undefined') anki.qFade=qFade;</script>
100 (milliseconds) is the default; set to 0 to disable fading.
Javascript
As Anki cards are treated like webpages, it is possible to embed some Javascript on your cards via the card template. For a good reference please read this post in the forums.
Because Javascript is an advanced feature and so many things can go wrong, Javascript functionality is provided without any support or warranty. We can not provide any assistance with writing Javascript, and can not guarantee any code you have written will continue to work without modification in future Anki updates. If you are not comfortable addressing any issues you encounter on your own, then please avoid using Javascript.
Each Anki client may implement card display differently, so you will need to test the behaviour across platforms. A number of clients are implemented by keeping a long running webpage and dynamically updating parts of it as cards are reviewed, so your Javascript will need to update sections of the document using things like document.getElementById() rather than doing things like document.write().
Functions like window.alert are also not available. Anki will write javascript errors to the terminal, so if you’re running on a Mac or Windows computer, you’ll need to manually catch the errors and write them to the document to see them. There is no debugger available, so to figure out problems you’ll need to break down your code until you discover which parts are causing problems.
Настройки
The preferences are available from the Tools menu on Windows/Linux, or the Anki menu on a Mac.
Basic
Video driver
Anki's libraries need a video driver to draw content on the screen.
Due to different hardware and software configurations, the driver that
works best on your machine may vary. ANGLE and OpenGL will perform better
than the software option, but they may not function correctly on some
systems. On Macs, you will almost always want to use the OpenGL option.
Show play buttons
Whether a clickable (re)play button will be shown in the review screen
for cards with audio.
Interrupt current audio
Whether a currently playing audio file should be stopped when answering
a card.
Paste clipboard images as PNG
By default Anki pastes images on the clipboard as JPG files, to save disk space.
You can use the option to paste as PNG images instead. PNG images support
transparent backgrounds and are lossless, but they usually result in much larger
file sizes.
Paste without Shift strips formatting
By default, formatting like bold and colors are kept when pasting,
unless the Shift key is held down. This option reverses the behaviour.
Night mode
Night mode will cause Anki to show cards as white text on a
black background. Some card templates may need to be modified to work
properly with this option enabled - please see night mode
styling for more information.
When adding, default to current deck
Controls how note types and decks interact. The default of "When adding, default
to current deck" means that Anki saves the last-used note type for each deck and
selects it again then next time you choose the deck (and, in addition, will
start with the current deck selected when choosing Add from anywhere). The other
option, "Change deck depending on note type," saves the last-used deck for each
note type (and opens the add window to the last-used note type when you choose
Add). This may be more convenient if you always use a single note type for each
deck.
Default search text Allows you to customize the starting search text in the browser (eg, to start with "deck:current").
User interface size If you find that the interface elements are too small for you, you can try to increase this setting.
Scheduling
Show next review time above answer buttons
Useful to know how far in the future your cards are being pushed.
Show remaining card count during review
Disable this option to hide the card count at the bottom of the screen.
Show learning cards with larger steps before
Only shown when the 2.1 scheduler is enabled. Normally learning cards with a 1+
day delay are shown after normal reviews. If checked, Anki will show them before
normal reviews instead.
Legacy timezone handling
Please see here:
https://faqs.ankiweb.net/timezone-handling-changes.html
V3 Scheduler
The Anki V3 scheduler is documented here:
https://faqs.ankiweb.net/the-2021-scheduler.html
Mix new cards and reviews: Only shown when the v1/v2 schedulers are enabled. This drop-down box controls when new cards are shown: either mixed with, before, or after all reviews.
Next day starts at
Controls when Anki should start showing the next day’s cards. The default
setting of 4AM ensures that if you’re studying around midnight, you won’t have
two days' worth of cards shown to you in one session. If you stay up very late
or wake up very early, you may want to adjust this to a time you’re usually
sleeping. Note that the start of the next day is relative to your current timezone.
Also note that any cards that cross a day boundary will appear at the start of
the day they are scheduled for, just like review cards do.
Learn ahead limit
Tells Anki how to behave when there is nothing left to study in the current deck
but cards in learning. The default setting of 20 minutes tells Anki that cards
should be shown early if they have a delay of less than 20 minutes and there’s
nothing else to do. If you set this to 0, Anki will always wait the full delay,
showing the congratulations screen until the remaining cards are ready to be
reviewed.
Timebox time limit
Timeboxing is a technique to help you focus by dividing a longer activity (such
as a 30 minute study session) into smaller blocks. If you set the timebox time
limit to a non-zero number of minutes, Anki will periodically show you how many
cards you’ve managed to study during the prescribed time limit.
Network
The network tab contains options related to syncing with AnkiWeb.
- When logged in, the deauthorize button will log you out.
- When the 'force changes' option is enabled, the next sync will ask you whether you wish to upload or download. This is useful if you have made some changes accidentally, and wish to overwrite them with an older version that is on AnkiWeb.
Настройки колоды
- Presets
- Subdecks
- Daily Limits
- New Cards
- Lapses
- Timer
- Burying
- Порядок отображения
- Audio
- Advanced
- Custom Scheduling
Deck options primarily control the way Anki schedules cards. It is recommended that you spend a few weeks with the defaults to get a feel for how Anki works before you start adjusting options. Please make sure you understand the options before changing them, as mistakes could reduce Anki's effectiveness.
Deck options are accessed by:
- Clicking the gear icon on the
Decksscreen. - Selecting a deck on the
Decksscreen, and then clickingOptionsat the bottom of the screen. - Clicking on
More>Optionswhile in review mode. - Pressing
owhile in review mode.
This page describes the options shown in Anki 2.1.45+, when you have the v2 or v3 scheduler enabled. On older versions, some options will not be available, or will appear in a different section.
Presets
Anki allows you to share options between different decks, to make updating options in many decks at once easy. To do this, options are grouped into presets. By default, all newly created decks use the same preset.
If you’d like to alter the settings on one deck but not other decks, click the arrow icon in the top right of the Deck Options window. The options are:
- Save: Saves all modifications you've made since opening the deck options screen.
- Add: Add a new preset, with the default options.
- Clone: Clone your current present, which is useful if you just want to modify certain options, keeping the rest as they are.
- Rename Changes the name of the current preset.
- Delete Deletes the current preset. This will require that the next sync is a one-way sync.
- Save to all subdecks. Like Save, but also assigns the selected preset to all subdecks of the currently selected deck.
Deck Options are not retroactive. For example, if you change an option that controls the delay after failing a card, cards that you failed prior to changing the option will have the old delay, not the new one.
Subdecks
If your deck has subdecks, each deck can optionally be assigned a different preset. When Anki shows a card, it will check which subdeck the card is in, and use the options for that deck. There are some exceptions:
- The new cards/day and reviews/day limits behave differently depending on the scheduler version you have selected.
- The display order options in the v3 scheduler are taken from the deck you select to study, not the deck of the current card.
For example, let's say you have this collection:
- Deck A (Preset 1)
  - Deck A::Subdeck B (Preset 2)
    - Card B1
    - Card B2
Preset 1 and 2 are identical, with two exceptions:
- Preset 1:
- New Cards - Learning steps: 1m 10m
- Display Order - New/review priority: Mix with reviews
- Preset 2:
- New Cards - Learning steps: 20m 2h
- Display Order - New/review priority: Show after reviews
If you choose to study Deck A:
- Learning steps for all new cards will be 20m 2h (preset 2 applies)
- All new cards will be mixed with reviews (preset 1 applies)
If you choose to study Subdeck B:
- Learning steps for all new cards will be 20m 2h (preset 2 applies)
- All new cards will be shown after reviews (preset 2 applies)
Daily Limits
New Cards/Day
Controls how many new cards are introduced each day you open the program. If you study fewer than the limit, or miss a day, the next day the counts will be back to your limit - they do not accumulate.
In the v3 scheduler, Anki uses the limits of the deck you select as an upper limit on the number of cards. This means if "French" has a limit of 20 cards and "French::Lesson 1" and "French::Lesson 2" both have limits of 15 cards, when you click on "French", you’ll get at most 15 cards from either child deck, and only 20 cards in total.
In the v1 or v2 scheduler, each parent applies its limits to its children. If you have decks in a grandparent-parent-child arrangement, both the grandparent and parent limits will alter how many cards are shown from the child, even if you click directly on the child. In the v3 scheduler, this has been simplified, and now each deck's limit controls how many cards from that specific deck can be used. Imagine that you have this collection:
- Parent deck (New Cards/Day: 20)
  - Child deck (New Cards/Day: 7)
    - Grandchild deck A (New Cards/Day: 5)
      - Cards 1 to 50
    - Grandchild deck B (New Cards/Day: 5)
      - Cards 51 to 100
- If you click on the Parent deck, you will get 10 new cards (from Grandchild decks A and B).
- If you click on the Child deck, you will get 7 new cards (from Grandchild decks A and B).
- If you click on any of the Grandchild decks, you will get 5 new cards.
Studying new cards will temporarily increase the number of reviews you need to do a day, as freshly learnt material needs to be repeated a number of times before the delay between repetitions can increase appreciably. If you are consistently learning 20 new cards a day, you can expect your daily reviews to be roughly about 200 cards/day. You can decrease the reviews required by introducing fewer new cards each day, or by turning off new card display until your review burden decreases. More than one Anki user has excitedly studied hundreds of new cards over their first few days of using the program, and then become overwhelmed by the reviews required.
If using the v3 scheduler, please keep in mind that the new count is capped by the review count. If your review limit is set to 200, and you have 190 reviews waiting, a maximum of 10 new cards will be introduced. If your review limit has been reached, no new cards will be shown. If you have a backlog of reviews and still want to introduce new cards, you can do so by suspending the reviews, or increasing your review limit. That said, it is recommended you hold off on new cards until you catch up instead, as introducing more new cards when you're behind will only make the backlog worse.
Maximum Reviews/Day
Allows you to set an upper limit on the number of reviews to show each day. When this limit is reached, Anki will not show any more review cards for the day, even if there are some waiting. If you study consistently, this setting can help to smooth out occasional peaks in due card counts, and can save you from a heart attack when returning to Anki after a week off. When reviews have been hidden due to this option, a message will appear in the congratulations screen, suggesting you consider increasing the limit if you have time.
In the v3 scheduler and v1 schedulers, the counts are affected by parents/selected decks in the same way as new cards.
In the v2 scheduler, the limit is taken solely from the deck you select - any limits on its parents or child decks are ignored.
The v3 scheduler includes learning cards with a 1+ day delay in the review count, so those learning cards will be subject to the daily limit.
New Cards
The settings in this section only affect new cards and cards in initial learning mode. Once a card has graduated (i.e. there are no more learning steps for this card), it becomes a review card, and the settings in this section are no longer applicable.
Learning Steps
Controls the number of learning repetitions, and the delay
between them. One or more delays, separated by spaces must be entered.
Each time you press Good during review, the card moves to the next step.
For example, let's say that your learning steps are 1m 10m 1d.
- When you press
Again, the card goes back to first step, and will be shown again approximately 1 minute later. - When you press
Goodon a new card, or a card answeredAgain, it will move to the next step, and be shown again in approximately 10 minutes. - When you press
Goodon a card after the 10 minute step, it will be delayed until the next day. - When you press
Goodon the card the next day, it will leave learning (i.e. it will graduate), and become a review card. It will be shown again after the delay configured by the graduating interval.
If there’s nothing else to study, Anki will show cards up to 20 minutes early by default. The amount of time to look ahead is configurable in the preferences.
Please see the learning section for more info on how steps work. Also, check this forum's post for more examples.
Day Boundaries
Anki treats small steps and steps that cross a day boundary differently. With small steps, the cards are shown as soon as the delay has passed, in preference to other waiting cards like reviews. This is done so that you can answer the card as closely to your requested delay as possible. In contrast, if the interval crosses a day boundary, it is automatically converted to days.
Graduating Interval
The delay in days between answering "Good" on a learning card with no steps left, and seeing the card again as a review card. Please see the example in the previous section.
Easy Interval
The delay between answering Easy on a learning
card, and seeing it in review mode for the first time.
The Easy button immediately turns a learning card into a review card,
and assigns it the delay you have configured. It should always be at least
as long as the graduating interval, and typically a few days longer.
Insertion Order
Controls whether Anki should add new cards into the deck randomly, or in order. When you change this option, Anki will re-sort the decks using the current Option Group. Cards with a lower due number will be shown first when studying, by default. Changing this option will automatically update the existing position of new cards.
One caveat with random order mode: if you review many of your new cards, and then add more new cards, the newly added material is statistically more likely to appear than the new cards that were already in the deck. For example, if you have 100 cards in random order, then review the first 50, newly added cards are still given position 1-100, but as you have already reviewed the first 50, the newly added cards are more likely to appear earlier. To correct this, you can change the order to Ordered mode and back again to force a re-sort.
When you select random order, Anki will randomize your notes, keeping the cards of a given note close together. The cards of a given note are shown in the order, in which their card types appear, so that siblings are introduced consistently — otherwise you could end up in a state where some notes had all their cards introduced and other notes had only one or two. Please see the "bury related" and "display order" sections below for more info.
Lapses
When you forget a review card, it is said to have 'lapsed', and the card must be relearnt. The default behaviour for lapsed reviews is to reset the interval to 1 (i.e. make it due tomorrow), and put it in the learning queue for a refresher in 10 minutes. This behaviour can be customized with the options listed below.
Relearning Steps
The same as 'learning steps', but for forgotten reviews. When you fail a card
(press Again), the card enters the relearning phase, and before it becomes a
review card again, you will have to pass all the relearning steps — or, alternatively, press
Easy on the card.
If you leave the steps blank, the card will skip relearning, and will be assigned a new review delay.
Minimum Interval
Specifies a minimum number of days a card should wait after it finishes relearning. The default is one day, meaning once relearning is finished, it will be shown again the next day.
Leeches
Control the way Anki handles leeches. Please see the leeches section for more information.
Timer
Anki monitors how long it takes you to answer each question, so that it can show you how long was spent studying each day. The time taken does not influence scheduling. The default limit is 60 seconds. If you take longer than that, Anki assumes you have walked away from your computer or have been distracted, and limits the recorded time to 60 seconds, so that you don’t end up with inaccurate statistics. If you consistently take longer than 60 seconds to answer a card, you may want to either consider raising this limit, or ideally, making your cards simpler.
Burying
Please see this section for more information.
Порядок отображения
The options in this section are taken from the deck you select to study, not the deck of the currently displayed card.
This section is only available when you have the v3 scheduler enabled.
Some further information about display order is available in the studying section.
New Card Gather Priority
Controls how Anki gathers cards from each subdeck.
With the default Deck ordering, cards are gathered from each subdeck in order,
stopping when the limit of the selected deck has been exceeded. This is faster,
and allows you to priorize subdecks that are closer to the top. Decks / subdecks
are always ordered alphabetically, so you can give them a numeric prefix like
001 to control the order they are shown. You can also use _ and ~ as a
prefix to place items at the top or bottom.
Although position order depends initially on the 'Insertion Order' setting above, you can manually reposition cards in different ways.
New Card Sort Order
Controls how cards are sorted after they have been gathered. By default, Anki sorts by template first, to avoid multiple cards of the same note from being shown in succession. This results in cards appearing in the order they have been added, with the first card template (eg front->back) appearing before later card templates (eg back->front).
New/Review Priority
Whether new cards should be mixed in with reviews, or shown before or after them.
Interday Learning/Review Priority
Whether learning cards with a 1+ day delay should be mixed in with reviews, or shown before or after them. Because learning cards tend to be harder than reviews, some users prefer to see them at the end (getting the easy stuff done first), or at the start (allowing more time to review forgotten ones).
Review Sort Order
The default order prioritizes cards that have been waiting longer, which works well when you are up to date, or when you only have a small backlog. If you have taken an extended break or have fallen behind in your reviews, you may want to consider changing the sort order temporarily. Sorting by ascending intervals will ensure cards with shorter delays are shown first, and by descending intervals will allow you to work through the easier material first.
Choosing the Deck, then due date option will ensure reviews are shown for each subdeck in turn. This is generally not recommended, as having material appear consistently in the same order makes it easier to guess the answer based on context, and may lead to weaker memories.
Audio
By default, Anki automatically plays audio on the front and back of
cards. If you uncheck 'automatically play audio', Anki will not play
audio until you press the replay audio key, r or F5.
Always include question side when replaying audio controls whether audio from the question side should be played when replaying the audio while an answer is shown. Please note that it does not control what happens when you show the answer; for that please see this section.
Advanced
Maximum Interval
Allows you to place an upper limit on the time Anki will wait to reshow a card. The default is 100 years; you can decrease this to a smaller number if you’re willing to trade extra study time for higher retention.
Starting Ease
Controls the easiness that cards start out with. It is
set when a card graduates from learning for the first time. It defaults
to 2.50, meaning that once you have finished learning a card, answering
Good on subsequent reviews will increase the delay by approximately
2.5x (e.g. if the last delay was 10 days, the next delay would be around 25
days). Based upon how you rate the card in subsequent reviews, the
easiness may increase or decrease from its starting value.
Easy Bonus
An extra multiplier applied to the interval when a review card is answered
Easy. With the default value of 1.30, Easy will give an interval that is
1.3 times the Good interval (e.g. if the last interval was 10 days, the next
interval would be around 13 days).
Interval Modifier
An extra multiplier that is applied to all reviews. At its default of 1.00 it does nothing. If you set it to 0.80, though, for example, intervals will be generated at 80% of their normal size (so a 10 day interval would become 8 days). You can thus use the multiplier to make Anki present cards more or less frequently than it would otherwise, trading study time for retention or vice versa.
For moderately difficult material, the average user should find they remember approximately 90% of mature cards that come up for review. You can find out your own performance by opening the graphs/statistics for a deck and looking at the Answer Buttons graph - mature retention is the correct% on the right side of the graph. If you haven’t been studying long, you may not have any mature cards yet. As performance with new cards and younger cards can vary considerably, it’s a good idea to wait until you have a reasonable amount of mature reviews before you start drawing conclusions about your retention rate.
On the SuperMemo website, they suggest that you can find an appropriate multiplier for a desired retention rate. Their formula boils down to:
log(desired retention%) / log(current retention%)
Imagine we have a current retention rate of 85% and we want to increase it to 90%. We’d calculate the modifier as:
log(90%) / log(85%) = 0.65
You can use Google to calculate it for you.
If you plug the resulting 65% into the interval modifier, you should find over time that your retention moves closer to your desired retention.
One important thing to note however is that the trade-off between time spent studying and retention is not linear: we can see here that to increase our retention by 5 percentage points, we would have to study 35% more frequently. If the material you are learning is very important then it may be worth the extra effort – that is, of course, something you will need to decide for yourself. If you are simply worried that you are forgetting too much, then you may find investing more time at the initial learning stage and/or using mnemonics will give you more gain for less effort.
One final thing to note is that Anki forces a new interval to be at least 1 day longer than it was previously, so that you do not get stuck reviewing with the same interval forever. If your goal is to repeat a card once a day for multiple days, you can do that by setting more learning mode steps, instead of by adjusting this modifier.
Hard Interval
The multiplier used when you use the Hard button. The percentage is relative
to the previous interval: e.g. with a default of 1.20, a card with a 10-day interval
will be given 12 days.
New Interval
The multiplier used when you use the Again button on a review card. The
default 0.00 means that a review card's delay is reset to zero when you forget it
(which then becomes 1 day after the minimum interval is
applied).
If changed from the default, it is possible for forgotten cards to preserve part of their previous delay. For example, if a card had a 100 day interval, and you set the New Interval to 0.20, the new interval would be 20 days.
While preserving part of the interval may seem to make sense, SuperMemo has observed that preserving part of the delay can actually be counter-productive. For this reason, we recommend you leave it on the default setting.
Custom Scheduling
Please see this page.
Syncing with AnkiWeb
- Intro Videos
- Setup
- Automatic Syncing
- Button Color
- Media
- Conflicts
- Merging Conflicts
- Firewalls
- Proxies
AnkiWeb is a service that allows you to keep your collection synchronized across multiple devices, and to study online. Please sign up for a free account before following the steps below.
Intro Videos
For a quick introduction to syncing, please check out the syncing intro videos.
Setup
To start syncing your collection across devices, click the sync button (the top right one on the main screen), or press 'y' on your keyboard. You’ll be prompted for your AnkiWeb ID and password, which you created in the signup process.
When you synchronize your collection for the first time, Anki will ask you if you want to upload or download. If you have cards on your computer and your AnkiWeb account is empty, choose "upload" to send your data to AnkiWeb. If you have cards on AnkiWeb from another device, and no cards on your computer, choose "download" to replace the empty local collection with the cards that are on AnkiWeb. If you have different cards on both devices, more work is required to avoid losing data.
Once the initial one way sync is completed, Anki will be able to merge changes from multiple locations with a few exceptions.
If you have multiple people using Anki on one machine and have created a profile for each user, each user will need to create their own AnkiWeb account to sync with. If you attempt to synchronize multiple profiles with a single AnkiWeb account, you will lose data.
Automatic Syncing
Once syncing is enabled, Anki will automatically sync each time your collection is closed or opened. If you would prefer to synchronize manually, you can disable automatic syncing in Anki’s preferences.
Button Color
The sync button will change to blue when a normal sync is required, and red when a full sync is required.
Media
Related video: https://www.youtube.com/watch?v=phP9GGG-PxY
Anki will synchronize any sounds and images used by your notes. It will notice when media has been added or removed from your media folder, but will not notice if you have edited some existing files without adding or removing any. To get your edits noticed, you need to add or remove a file as well.
If you’re running Anki off a USB flash drive, you should use an NTFS file system, as Anki may not be able to detect media changes on a FAT32 filesystem.
Conflicts
Related video: https://www.youtube.com/watch?v=UEAcpfMQnjo
Under normal circumstances, reviews and note edits can be merged, so if you review or edit on two different devices before syncing, Anki will preserve your changes from both locations. If the same card has been reviewed in two different locations, both reviews will be marked in the revision history, and the card will be kept in the state it was when it was most recently answered.
There are certain changes that Anki is unable to merge. These mainly relate to the format of notes: things like adding a new field, or removing a card template. When you perform an operation that can’t be merged, Anki will warn you, and give you the option of aborting the operation. If you choose to continue, you’ll be asked to choose whether to keep the local copy or the copy on AnkiWeb when your collection is next synchronized.
If certain problems are detected while syncing, it will also force a one way sync. If you find this consistently happens, please post on our support site.
When a one way sync is required, you need to choose whether you wish to keep the collection on your local device, or the collection on AnkiWeb. If changes have been made on both ends, only changes on one end can be preserved.
If you choose Upload, the content on your local device will be sent to AnkiWeb. You then need to sync your other devices, and choose "Download" to have them grab a copy of that content.
If you choose Download, it will replace any local changes you’ve made with the data that is on AnkiWeb.
Once all devices are in sync, future syncs will return to the normal behaviour of merging changes from both ends.
If you wish to force a full upload or download (for example, because you accidentally deleted a deck on one side and want to restore the deck rather than having its deletion synchronized), you can check the "On next sync, force changes in one direction" box in Tools>Preferences>Network, then sync as usual. (You’ll be given the option to choose which side you want to use.)
Forcing a one way sync only affects card syncing - media is synced as normal. If you have files that you want to remove from AnkiWeb, please ensure your client is fully in sync first. After syncing is up to date, any files you remove (eg via the Check Media function) will be removed from AnkiWeb on the following sync.
Merging Conflicts
Because the first sync can only sync changes in one direction, if you have added different content to different devices or profiles before setting syncing up, content on one device will be lost if you overwrite it with the content from the other device. With some work, it is possible to manually merge data into a single collection.
Start by taking a backup on each device/profile, in case something goes wrong. With the computer version you can use File>Export to export "all decks" with scheduling information and media files included, and save the file somewhere safe. In AnkiMobile, the Add/Export button on the decks list screen will let you export all decks with media.
Next, if one of your devices is a mobile device, synchronize it first. If there’s a conflict, choose "upload" to overwrite any existing data on AnkiWeb with the data from your mobile device. If both devices/profiles are on your computer, synchronize the device/profile with the most number of decks first.
Now return to the other device/profile. If automatic syncing is enabled, a message may pop up asking if you want to upload or download. Click the cancel button - we don’t want to sync yet.
Once you’re looking at the deck list, click the cog icon next to the first deck, and choose "export". Export the content with scheduling information and media included, and save the .apkg file somewhere. Now you’ll need to repeat this for each top-level deck.
Once all top-level decks have been exported, click the sync button at the top right, and choose "download", which will overwrite the local content with the content you synced from your other device.
You can now use File>Import to import the .apkg files you exported earlier, which will merge the exported content with the existing content, so everything will be in one place.
Firewalls
Anki needs to be able to make outbound HTTPS connections to sync. At a minimum it must be able to connect to ankiweb.net, sync.ankiweb.net and syncN.ankiweb.net, where N is number between 2 and 6. These domains may change over time, and the IP addresses they point to may also change, so we recommend you allow wildcard access to *.ankiweb.net to reduce the chance of the firewall rules needing to be updated in the future.
If you have a firewall on your machine, you should add an exception for Anki. If you are on a work or school network, please contact your network administrator for assistance - it is not something we can help you with.
Proxies
If you need a proxy to access the internet, Anki should automatically pick up your system proxy settings if you’re on Windows or macOS, and will honour the HTTP_PROXY environment variable if you’re on another platform.
Anki will only be able to pick up your system settings if a proxy is manually configured, and does not require a password. If your system uses automatic proxy setup, or uses a proxy that requires a username and password, you will need to manually tell Anki the proxy configuration.
To tell Anki your proxy settings, define a HTTPS_PROXY environmental variable that points to the proxy server. It will look like:
http://user:pass@proxy.company.com:8080
If your username or password contains an @ (eg user@workdomain.com),
you need to change it to %40, like so:
http://user%40workdomain.com:pass@proxy.company.com:8080
Anki 2.0 expects to find HTTP_PROXY instead of HTTPS_PROXY.
To set environmental variables on Windows, please see https://www.google.com/search?q=windows+set+environmental+variable
If you’re on a Mac, please see http://stackoverflow.com/questions/135688/setting-environment-variables-in-os-x
Heavily locked down networks that intercept secure connections and present their own certificate instead may cause Anki to throw up SSL errors. In such environments, you may be able to work around the errors with https://ankiweb.net/shared/info/878367706
An alternative solution is to install a local proxy server, and point that proxy server at your normal proxy server. You can then tell Anki to use the local proxy, which will redirect requests to the proxy you normally use.
Profiles
If more than one person wants to use Anki on your computer, you can set up a separate profile for each user. Each user profile has their own collection, and own program settings. Add-ons are shared across profiles. Profiles are configured by going to the File menu and choosing "Switch Profile".
Only a single profile can be synced to an AnkiWeb account. If you have different users on your computer, each user will need to set up a separate AnkiWeb account for their profile. If you attempt to link two or more profiles to the same AnkiWeb account, you will overwrite the data from one profile with the data from the other.
Profiles are primarily intended to be used by different people, and are not recommended for splitting up your own content. If you have created multiple profiles for yourself, the best option is to merge them into a single profile. You can do so by exporting one deck from profile A, and then importing it into profile B, repeating for any other decks in profile A, until everything is in profile B.
AnkiDroid does not support profiles.
Profiles window
From the Profiles window (accessible via File>Switch Profile from the main window), you can:
- Open / Add / Rename / Delete user profiles.
- Quit the program.
- Restore an automatic backup.
- Downgrade your collection, which is necessary if you want to open it with an earlier Anki release. If you skip this step, you may get an error message when opening your collection in an older Anki version, and you will need to return to this version, downgrade, then try again.
Browsing
- Table Modes
- Sidebar
- Search Box
- Card/Note Table
- Editing Area
- Menus and Actions
- Find and Replace
- Finding Duplicates
The Browse window allows you to search through your cards and notes, and edit them. It is opened by clicking Browse in the main window, or by pressing B. It is comprised of three sections: the sidebar on the left, the card/note table on the top right, and the editing area on the bottom right. By positioning the mouse between two sections, it is possible to click and drag to expand one section and shrink the other.
Table Modes
Anki 2.1.45+ offers two modes: either cards or notes are shown in the data table. You can change the current mode by clicking the switch at the top, to the left of the search area, or pressing Alt+T. The switch also indicates if Cards or Notes are currently shown.
Note: For the sake of simplicity, this manual generally assumes the Cards mode to be the active one. Whenever selecting/finding/etc. "cards" is mentioned, the reader may substitute it for "cards or notes depending on the active mode".
Sidebar
The sidebar on the left allows quick access to common search terms. On Anki 2.1.45+, it also provides a searchbar, facilities to edit tags and decks, and a choice of two different tools, which are discussed in the following sections. You can switch tools using the toolbar at the top of the sidebar or the shortcuts Alt+1/2.
Search Tool
With this tool, the sidebar behaves as in previous versions: Clicking on an item will search for it.
You can hold down Ctrl (Command on Mac) while clicking in order to append the clicked item to the current search with an AND condition, instead of starting a new search. If you wanted to show learning cards that were also in the German deck for instance, you could click on "Learning", then Ctrl-click on "German".
You can hold down Shift to create an OR search instead of an AND. For example, you could click one deck, then Shift-click another to show cards from either of the decks in the same view.
You can hold down Alt (Option on Mac) in order to reverse the
search (prepend a -): for example, to show all cards in a current deck that
do not have a certain tag. Alt/Option can be combined with
either Ctrl or Shift (e.g. clicking with Ctrl+Alt
will result in adding a new search term that is negated).
On Anki 2.1.39+, you can also hold down both Ctrl and
Shift together when clicking a search term to replace all occurrences of the
same kind of search with the new one.
Let's say you had previously typed in a complicated search expression like
deck:Swahili (is:due or tag:important)
and now want to perform the same search for your Urdu deck. You can hold down
Ctrl+Shift while clicking the Urdu deck in the sidebar to obtain the
following search expression:
deck:Urdu (is:due or tag:important).
Selection Tool
The Selection tool allows for selecting multiple items at the same time by holding down Ctrl
or Shift while clicking. It also enables drag-and-drop to reorder decks and tags.
Here is an example: Say you have the tags Math, Calculus, and Algebra.
Click on the Calculus tag, then Ctrl-click on the Algebra tag. Now both
tags are selected, click and drag any of the two onto the Math tag to make them
both children of this tag. Behind the scene, Anki has renamed the two tags to
Math::Calculus and Math::Algebra respectively and updated your notes accordingly.
Another use case for selecting multiple items is searching: If you right-click on a selection of items, you can choose Search > All/Any Selected. This can be combined with keyboard modifiers as described in Search Tool to append the resulting search to the current search.
Saved Searches
If you regularly search for the same thing, you can save the current search by right-clicking the topmost item in the sidebar, choosing “Save Current Search” and typing in a name. You can also drag and drop any sidebar item onto this area to add an equivalent saved search, effectively pinning it at the top.
Editing Items
You can delete or rename tags, decks, and saved searches directly from the sidebar, from the right-click menu, or by using a shortcut key (Del and F2 on Windows). Deletion even works for multiple items at once (see Selection Tool).
Finding Items
To find a certain item in the sidebar tree, type part of its name into the searchbar at the top to temporarily hide all items not matching the search.
Search Box
Above the card list is a search box. You can type in various things there to search for cards. For information on the search syntax, see Searching.
Card/Note Table
The table's rows represent cards or notes that match the current search. When you click on a row, the corresponding note will be shown in the bottom section.
Rows
If you drag the mouse or hold Ctrl or Command to select multiple rows, the editor will be temporarily hidden. Various operations (such as changing the deck) can operate on multiple cards or notes at once, independent of the active mode. Therefore in Cards mode, a note is considered to be selected if any of its cards is selected, and in Notes mode, a card is considered to be selected if its note is selected.
Other operations (like showing card information) only operate on a single card or note. This is called the current card or note, which is usually the one that was last selected or clicked. In Cards Mode, again, the current note is the note of the current card and in Notes mode, the current card is the first card of the current note.
The background colour will change depending on the card and note. In Cards mode, the first match will be used:
- if the card is flagged, use the flag colour,
- if the card is suspended, yellow,
- if the card's note is marked, purple.
In Notes mode, colour is only applied to marked notes.
For more information about marked notes and suspended cards, see Editing and
More.
Columns
The columns are configurable: right click on one (or Ctrl-click on a Mac) to choose which columns you'd like to see. You can drag columns to reorder them. Clicking on a column will sort by that column; click again to reverse the sort order. Note that you cannot sort by the Question and Answer columns.
All columns are available for both Cards and Notes mode but sometimes with slightly different names and data. The following table lists the behaviours for both modes.
| Column | Cards mode | Notes mode |
|---|---|---|
| Answer | The back side of the card in one line with the question stripped. You can also choose a custom format in the card type editor instead. | The same as in Cards mode, only for the first card of the note. |
| Card(s) | The name of the card's template. | The number of cards the note has. |
| Card Modified | The last time changes were made to the card (e.g. when you reviewed the card and the review history and interval were updated). | The last time changes were made to one of the note's cards. |
| Created | The same as in Notes mode for the card's note. | The date the note was created. |
| Deck | The name of the deck the card is in. | The number of different decks the note's cards are in, or the deck name if all cards are in the same deck. |
| Due | The due date for cards in review or (re)learning, and the position in the new card queue for new cards. The line is wrapped in brackets if the card is suspended or buried. Sorting is done by type and only then by date or position. | The due date for the note's next due review or (re)learning card that is not suspended, buried or in a filtered deck. |
| (Avg.) Ease | The card's ease if it is not new. | The average ease for the note's cards that are not new. |
| (Avg.) Interval | The card's interval if the card is in review or relearning. | The average interval for the note's cards that are in review or relearning. |
| Lapses | How often the card was rated “Again”. | The total lapses for all cards of the note. |
| Note | The same as in Notes mode for the card's note. | The name of the note's notetype. |
| Note Modified | The same as in Notes mode for the card's note. | The last time the note (e.g. the content of a field) was edited. |
| Question | The front side of the card in one line. You can also choose a custom format in the card type editor instead. | The same as in Cards mode, only for the first card of the note. |
| Reviews | How often the card has been reviewed. | The total review count for all cards of the note. |
| Sort Field | The same as in Notes mode for the card's note. | The content of the note's field that is defined as the notetype's sort field. Only this one field can be displayed and sorted by. You can change the sort field by clicking Fields... in the editing area. |
| Tags | The same as in Notes mode for the card's note. | The note's tags. |
Editing Area
The bottom right area displays the note of the currently selected row. For more information about cards and notes, see Getting Started. For more information on formatting buttons, see Editing.
You can see a preview of what the currently selected card would look like when reviewing by clicking the Preview button at the top of the editing area. Note that this will not display any type-the-answer fields on your cards, which makes it easier to preview the cards quickly. In Notes mode, the preview is shown for the first card of the selected note.
Menus and Actions
At the top of the browser window, you find a toolbar with various menus which in turn offer various actions that can be performed in the browser.
Edit
| Name | Action |
|---|---|
| Undo | Revert the most recently performed operation. |
| Select All | Select all rows displayed. |
| Select Notes | Show only the currently selected notes and select all rows. |
| Invert Selection | Select those rows not selected, and deselect the currently selected rows. |
| Create Filtered Deck | Show the filtered deck dialog and set the current browser search as a filter. Use Alt / Option to set the second filter instead (requires scheduler version 2+). |
Notes
Most of the following actions operate on the selected notes. They are also available through a context menu when a selected row is right-clicked in Notes mode. In Cards mode, they can be found in a submenu of the context menu.
| Name | Action |
|---|---|
| Add Notes | Open the Add dialog. |
| Export Notes | Open the Export dialog. |
| Add Tags | Add provided tags to all selected notes. |
| Remove Tags | Enter tags and remove them from all selected notes. |
| Clear Unused Tags | Remove all tags from the sidebar that are not used by any notes. |
| Toggle Mark | If the current note is marked (i.e., has the Marked tag), unmark all selected notes. If the current is not marked, mark all selected notes. |
| Change Notetype | Convert the selected notes from one type to another. For example, imagine you have a Russian notetype and a Computer notetype, and you accidentally added some computer-related text into a Russian note. You can use this option to fix that mistake. The scheduling of cards is not affected. Changing the type of a note requires a one-way sync. |
| Find Duplicates | Open the Duplicates dialog. |
| Find and Replace | Open the Find and Replace dialog. |
| Manage Notetypes | Open the Notetypes dialog. |
| Delete | Delete all selected notes and their cards. It is not possible to remove individual cards, as individual cards are controlled by the templates. |
Карточки
The following actions operate on the currently selected cards. They are also available through a context menu when a selected row is rightclicked in Cards mode. In Notes mode, they can be found in a submenu of the context menu.
| Name | Action |
|---|---|
| Change Deck | Move currently selected cards to a different deck. |
| Set Due Date | Turn cards into review cards, and make them due on a certain date. This can be useful for moving cards forward or back a few days when your study schedule is interrupted. Entering a range like 60-90 will make the selected cards due between 60 and 90 days from now. New cards will have their interval set to the same delay, but reviews will be rescheduled without changing their current interval, unless '!' is included at the end of the range. |
| Forget | Move currently selected cards to the end of the new queue. The existing review history is preserved. |
| Reposition | Change the order new cards will appear in. You can find out the existing positions by enabling the due column, as described in the table section above. If you run the reposition command when multiple cards are selected, it will apply increasing numbers to each card in turn. By default the number increases by one for each card, but this can be adjusted by changing the "step" setting. The Shift position of existing cards option allows you to insert cards between currently existing ones, pushing the currently existing ones apart. For instance, if you have five cards and you want to move 3, 4, and 5 between 1 and 2, selecting this setting would cause the cards to end up in the order 1, 3, 4, 5, 2. By contrast, if you turn this option off, 1 and 2 will get the same position number (and it will thus be unpredictable which of the cards with the same number comes up first). Please note that when enabled, any card with a higher position will be modified, and all of those changed cards will need to be sent the next time you sync. |
| Toggle Suspend | Suspend or unsuspend all selected cards, depending on whether the current card is suspended or not. |
| Flag | Toggle the flags of all selected cards. Whether a flag is added or removed depends on whether the current card has the chosen flag. |
| Info | Show various information about the current card, including its review history. For more information, see Card Info. |
Go
This menu exists to provide keyboard shortcuts to jump to various parts of the browser, and to go up and down the card list.
Find and Replace
This dialog allows for replacing text on notes. As described above, it is available from the toolbar and the table's context menu.
The first input field is for the text that is going to be replaced, the second one for the replacement. Next, there is a dropdown menu that allows you to specify where Anki should look for text to replace: in a note's tags (requires Anki 2.1.45+), in all fields, or just in a specific field (only fields belonging to a selected note will be listed).
By default, only selected notes will be affected. If you want to lift that restriction, you can untick the "selected notes only" checkbox (requires Anki 2.1.45+).
The regular expression option allows you to perform complex replacements. For example, assume there is the following text in a field:
<img src="pic.jpg" />
We use these settings:
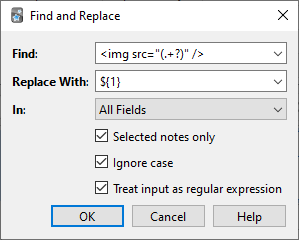
(Note that on Anki versions prior to 2.1.28, you would need to replace ${1}
with \1.)
Then the assumed field content will change to:
pic.jpg
A full discussion on regular expressions is outside the scope of this document. There are a number of syntax guides available on the web:
- For Anki 2.1.28+, see https://docs.rs/regex/latest/regex/index.html#syntax.
- For older Anki versions, see http://docs.python.org/library/re.html.
Finding Duplicates
You can use the Notes > Find Duplicates option to search for notes that have the same content. When you open the window, Anki will look at all of your note types and present a list of all possible fields. If you want to look for duplicates in the Back field, you’d select it from the list and then click Search.
By default, it will search in all note types that have the field you provided. This differs from the duplicate check when you add cards manually, which is limited to a single note type.
The Optional filter text box allows you to narrow down where Anki will look for duplicates. If you only want to search for duplicates in the "French Vocab" and "French Verbs" note types, you would enter:
"note:french vocab" or "note:french verbs"
Or you might want to look only for duplicates in a particular deck, so you could use:
"deck:myDeck"
The search syntax is the same as used when searching in the browser. For more information, see Searching.
You can click one of the links in the search results list to display the duplicate notes in that set. If the search brings up a large number of duplicates, you may wish to instead click the Tag Duplicates button, which will tag all matching notes with duplicate. You can then search for this tag in the browser and handle them all from the same screen.
Фильтрованные колоды и зубрёжка
- Custom Study
- Home Decks
- Creating Manually
- Order
- Steps & Returning
- Counts
- Due Reviews
- Reviewing Ahead
- Rescheduling
- Catching Up
When you study a regular deck in Anki, only a limited number of cards are shown: the cards Anki thinks you are about to forget, and a daily limit of new cards. This is generally useful, as it ensures you don't spend more time studying than necessary. But sometimes it can be useful to step outside of these normal limits, such as when you need to review for a test, focus on particular material, and so on. To make this possible, Anki provides a different type of deck called a 'filtered deck'.
Filtered decks offer a lot of possibilities. They can be used for previewing cards, cramming cards before a test, studying particular tags, catching up on a backlog with a particular sort order, reviewing ahead of schedule, going over the day's failed cards, and more.
Custom Study
The easiest way to create a filtered deck is with the Custom Study button, which appears at the bottom of the screen when you click on a deck. It offers some convenient preset filters for common tasks like reviewing the cards that you have failed that day. It will create a filtered deck called "Custom Study Session" and automatically open it for you.
If an existing "Custom Study Session" deck exists, it will be emptied before a new one is created. If you wish to keep a custom study deck, you can rename it from the deck list.
Here is a summary of each of the options:
Increase today's new card limit
Add more new cards to the deck you are currently studying. Note that
unlike other options, this does 'not' create a new filtered deck, it
modifies the existing deck.
Increase today's review card limit
If not all reviews due today were shown because of the daily review limit,
this option allows you to show more of them. As with the new cards
option, this modifies the existing deck.
Review forgotten cards
Show all the cards, for which you've answered Again (1) within the number of days
you specify.
Review ahead
Show cards that will be due in the near future (the number of days you
specify). This is useful for working through some of your older cards
before a vacation, but it will not help with cards you have learnt
recently. Please see the reviewing ahead section
below for more info.
Preview new cards
Show cards that you have recently added, without converting them to
review cards as they are answered.
Study by card state or tag
Select a certain number of cards from the current deck to study. You can
choose to select new cards only, due cards only, or all cards; after you
click "Choose Tags", you can also limit the selected cards by tags. If
you wish to see all the cards in the deck (for instance, to study before
a big test), you can set the number of cards to more than the number of
cards in the deck.
Home Decks
When a card is moved to a filtered deck, it retains a link to the deck, from which it came. That previous deck is said to be the card's 'home deck'.
Cards automatically return to their home deck after they are studied in the filtered deck. This can be after a single review, or after multiple reviews, depending on your settings.
It is also possible to move all cards back to their home decks at once:
-
The "Empty" button in the study overview moves all cards in the filtered deck back to their home deck, but does not delete the empty filtered deck. This can be useful if you want to fill it again later (using the Rebuild button).
-
Deleting a filtered deck does the same thing as "Empty" does, but also removes the emptied deck from the deck list. No cards are deleted when you delete a filtered deck.
In the old scheduler, if you create, rebuild, empty, or delete a filtered deck while cards are still in learning, they will be turned back into new cards. In the case of failed reviews in relearning, any remaining relearning steps will be skipped. This was fixed in the v2 scheduler so cards are no longer reset.
Creating Manually
Advanced users can create filtered decks with arbitrary search strings (or 'filters'), instead of relying on the preset filters. To create a filtered deck manually, choose Create Filtered Deck from the Tools menu.
When you click the Build button, Anki finds cards that match the settings you specified, and temporarily moves them from their existing decks into your new filtered deck for study.
If you wish to fetch cards again using the same filter options (for instance, if you want to study all cards with a particular tag every day), you can use the Rebuild button at the bottom of the deck's overview screen.
The search area controls what cards Anki will gather. All of the searches possible in the browser are also possible for filtered decks, such as limiting to tags, finding cards forgotten a certain number of times, and so on. Please see the searching section of the manual for more information on the different possibilities.
Filtered decks cannot pull in cards that are suspended, buried, or already in a different filtered deck. And if you are using the v1 scheduler, cards in (re)learning will not be included either. For this reason, a search in the browser may reveal cards that do not end up in the filtered deck.
The limit option controls how many cards will be gathered into the deck. The order you select controls both the order cards are gathered in, and the order they will be reviewed in. If you select "most lapses" and a limit of 20 for example, then Anki will show you only the 20 most lapsed cards.
Order
The "cards selected by" option controls the order that cards will appear in. If the maximum number of cards you select is lower than the number of cards that match the filter criteria, Anki will exclude the cards at the end of this sorted list first.
Oldest seen first
Display those cards first, that you haven't seen in reviews for the longest
time.
Random
Randomize the order of all cards that match the filter criteria (use no
set order).
Increasing intervals
Display cards that have the smallest interval first.
Decreasing intervals
Display cards that have the largest interval first.
Most lapses
Display those cards first, that you have failed the most times.
Order added
Display cards that you added first (i.e. those cards that have the earliest
creation date).
Order due
Display cards with the earliest due date first.
Latest added first
Display those cards first, that you have most recently added to the deck.
(This is the opposite of 'Order added'.)
Relative overdueness
Display those cards first, that are most overdue in relation to their current
interval (for instance, a card with a current interval of 5 days
overdue by 2 days displays before a card with a current interval of 5
years overdue by a week). This is useful if you have a large backlog
that may take some time to get through and you want to review those cards
first, that you are most in danger of forgetting.
Steps & Returning
Please see the section on learning as a reminder of how steps work.
By default, Anki will use the steps of a card’s home deck. If a new card would normally be reviewed twice when being learnt, the same thing will happen when you study it in a filtered deck.
Cards return to their home deck when (re)learning is complete. Thus if you have 3 learning steps, a new card will return to its home deck upon three presses of "Good" or a single press of "Easy".
v1 and v2 scheduler
In the v1 scheduler, the custom steps option allows you to override the home deck’s steps and provide your own steps instead. The provided steps apply to both cards being learnt, lapsed reviews, and reviews ahead of time. Please note, however, that from the v2 scheduler filtered decks no longer support custom steps.
v3 scheduler
Filtered decks with rescheduling disabled show 4 buttons in the v3 scheduler - the provided delay applies to the Again button, and Hard/Good will use 1.5x and 2x the provided delay. Easy will remove the card.
Counts
In a filtered deck, reviews that were already due are displayed in the review count as normal. Learning cards and non-due reviews are counted in the new card count, due to how the underlying implementation works. Reviews that were not due are not scheduled like new cards however: Anki uses a special algorithm that takes into account how close they were to their normal due time when reviewed.
Due Reviews
If the filtered deck includes cards that were due for review, they will be shown like they would have been in their original deck: they appear in the review card count at the bottom of the screen, and there are four choices for how well you remembered. Upon a correct answer, the card will be moved back to its home deck, and its next delay adjusted using the home deck's settings. If you forget the card, it will be shown according to the relearning steps defined in the home deck.
Reviewing Ahead
If your search included cards that are not due, Anki will show the reviews ahead of time.
Anki uses a special algorithm for these reviews that takes into account how early you are reviewing. If the cards were almost due to be shown, they will be given a new delay similar to what they would have received if you had reviewed them on time. If the cards are reviewed soon after they were scheduled however, their new delay will be similar to their previous delay. This calculation works on a sliding scale.
Because reviewing a card shortly after it is scheduled has little impact on scheduling (e.g. a card due tomorrow with a one day interval will remain due tomorrow if reviewed early), the "review ahead" custom study setting is not appropriate for repeated use. If used to go through a week's worth of cards before a trip, the mature cards will be rescheduled into the future and the new cards will remain at small intervals, because you don't know them well enough for them to be rescheduled further. If you review ahead again the next day, all you'll end up doing is going through those same new cards again, to little benefit.
Early reviews are included in the new card count rather than the review count, and will be shown according to the number of relearning steps defined in the home deck (unless you have provided custom steps). This means that if you have customized the number of relearning steps in the home deck, the non-due card may be shown more than once.
If you have multiple steps, Anki will only consider the first answer when deciding the next delay, and like relearning in normal decks, "Good" and "Easy" differ only in the step change and not the resulting delay.
Rescheduling
By default, Anki will return cards to their home decks with altered scheduling, based on your performance in the filtered deck. There is a reschedule cards based on my answers option available which alters this behaviour.
From the v2 scheduler, when rescheduling is disabled, cards are shown in a simple "preview mode", and when they are returned to the original deck, they are returned exactly as they started.
In the v1 scheduler, cards were presented more similarly to how they normally are, but studying cards had side effects, and the original position of new cards was lost when you studied them.
Catching Up
Filtered decks can be useful for catching up when you've fallen behind in your reviews. One Anki user describes the way they use the filtered decks to catch up as follows:
I did this for a backlog of 800 cards with filtered subdecks. Worked
very well for me.

Just Due filter with: "is:due prop:due>-7"

Over Due filter with: "is:due prop:due<=-7"

The Just Due deck will then contain cards that became due in the past
week. That's the deck you should study every day as it gets the cards
that become due regularly. With this you can study as if there weren't
any backlog.

The Over Due deck will contain your backlog — cards which you didn't
study in time. You can study them the same way you would study new
cards. They go back into the regular cards, so the number of overdue
will never grow as long as you keep your Just Due deck in check.

How long it takes depends on how many overdue cards you study each day
in addition to the ones that become due regularly. You can still motor
through them when you feel like it - or you can do a specific number per
day like you would for new cards. Up to you.
Searching
- Simple searches
- Limiting to a field
- Tags, decks, cards and notes
- Ignoring accents/combining characters
- Regular expressions
- Card state
- Card properties
- Recent Events
- Matching special characters
- Object IDs
Anki's Browse screen and the Filtered Deck feature use a common method of searching for specific cards/notes.
Simple searches
When you type some text into the search box, Anki finds matching notes and displays their cards. Anki searches in all fields of the notes, but does not search for tags (see later in this section for how to search for tags). Some examples:
dog
search for "dog" - will match words like "doggy" and "underdog" too.
dog cat
finds notes that have both "dog" and "cat" on them, such as "raining
cats and dogs".
dog or cat
finds notes with either "dog" or "cat".
dog (cat or mouse)
finds notes with dog and cat, or dog and mouse.
-cat
finds notes without the word "cat".
-cat -mouse
finds notes with neither "cat" nor "mouse".
-(cat or mouse)
same as the above.
"a dog"
finds notes with the exact sequence of characters "a dog" on them, such
as "atta dog", but not "dog a" or "adog".
-"a dog"
finds notes without the exact phrase "a dog"
d_g
finds notes with d, <a letter>, g, like dog, dig, dug, and so on.
d*g
finds notes with d, <zero or more letters>, g, like dg, dog, dung,
etc.
w:dog
search for "dog" on a word boundary - will match "dog", but not "doggy"
or "underdog". Requires Anki 2.1.24+ or AnkiMobile 2.1.61+.
w:dog*
will match "dog" and "doggy", but not "underdog".
w:*dog
will match "dog" and "underdog", but not "doggy".
Things to note from the above:
-
Search terms are separated by spaces.
-
When multiple search terms are provided, Anki looks for notes that match all of the terms - an implicit 'and' is inserted between each term. On Anki 2.1.24+ and AnkiMobile 2.0.60+ you can be explicit if you like ("dog and cat" is the same as "dog cat"), but older Anki versions will treat "and" as just another word to search for.
-
You can use "or" if you only need one of the terms to match.
-
You can prepend a minus sign to a term to find notes that don’t match.
-
You can group search terms by placing them in parentheses, as in the dog (cat or mouse) example. This becomes important when combining OR and AND searches — in the example, with the parentheses, it matches either 'dog cat' or 'dog mouse', whereas without them it would match either 'dog and cat' or 'mouse'.
-
Anki is only able to search within formatting in the sort field you’ve configured. For example, if you add "example" to one of your fields, this will not be matched when searching for "example" unless that field is the sort field. If a word is not formatted, or the formatting does not change in the middle of the word, then Anki will be able to find it in any field.
-
Standard searches are case insensitive for Latin characters - a-z will match A-Z, and vice versa. Other characters such as Cyrillic are case sensitive in a standard search, but can be made case insensitive by searching on a word boundary or regular expression (w:, re:).
Limiting to a field
You can also ask Anki to match only if a particular field contains some text. Unlike the searches above, searching on fields requires an 'exact match' by default.
front:dog
find notes with a Front field of exactly "dog". A field that says "a
dog" will not match.
front:*dog*
find notes with Front field containing dog somewhere
front:
find notes that have an empty Front field
front:_*
find notes that have a non-empty Front field
front:*
find notes that have a Front field, empty or not
fr*:text
find notes in a field starting with "fr". Requires Anki 2.1.24+ or AnkiMobile 2.1.60+.
Tags, decks, cards and notes
tag:animal
find notes with the tag "animal", or subtags like "animal::mammal"
tag:none
find notes with no tags
tag:ani*
find notes with tags starting with ani
deck:french
find cards in a French deck, or subdecks like French::Vocab
deck:french -deck:french::*
find cards in French, but not subdecks
deck:"french vocab"
searching when a deck has a space
"deck:french vocab"
also ok
deck:filtered
filtered decks only
-deck:filtered
normal decks only
card:forward
search for Forward cards
card:1
search for cards by template number - eg, to find the second cloze
deletion for a note, you’d use card:2
note:basic
search for cards with a Basic note type
Ignoring accents/combining characters
Requires Anki 2.1.24+ or AnkiMobile 2.0.60+.
You can use nc: to remove combining characters ("no combining"). For example:
nc:uber
matches notes with "uber", "über", "Über" and so on.
nc:は
matches "は", "ば", and "ぱ"
Searches that ignore combining characters are slower than regular searches.
Regular expressions
Anki 2.1.24+ and AnkiMobile 2.0.60+ support searching in notes with "regular expressions", a standard and powerful way of searching in text.
Start a search with re: to search by regular expression. To make things easier, Anki will
treat the following as raw input, so bear in mind the rules listed there.
Some examples:
"re:(some|another).*thing"
find notes that have "some" or "another" on them, followed by 0 or more characters, and then "thing"
re:\d{3}
find notes that have 3 digits in a row
Regular expressions can also be limited to a specific field. Please note that unlike the normal searches in a specific field, regular expressions in fields don't require an exact match. Eg:
front:re:[a-c]1
matches uppercase or lowercase a1, B1 or c1 that occurs anywhere in the "Front" field
front:re:^[a-c]1$
like the above, but will not match if any other text falls before or after a1/b1/c1.
You can learn more about regular expressions here: https://regexone.com/lesson/introduction_abcs
Some things to be aware of:
- The search is case-insensitive by default; use (?-i) at the start to turn on case sensitivity.
- Some text like spaces and newlines may be represented differently in HTML - you can use the HTML editor in the editing screen to see the underlying HTML contents.
- For the specifics of Anki's regex support, please see the regex crate documentation: https://docs.rs/regex/1.3.9/regex/#syntax
Card state
is:due
review cards and learning cards waiting to be studied
is:new
new cards
is:learn
cards in learning
is:review
reviews (both due and not due) and lapsed cards
is:suspended
cards that have been manually suspended
is:buried
cards that have been buried, either automatically or
manually
Note that with the new scheduler, Anki now distinguishes between manually and automatically buried cards so you can unbury one set without the other.
Cards that have lapsed fall into several of these categories, so it may be useful to combine them to get more precise results:
is:learn is:review
cards that have lapsed and are awaiting relearning
-is:learn is:review
review cards, not including lapsed cards
is:learn -is:review
cards that are in learning for the first time
flag:1
cards with a red flag
flag:2
cards with an orange flag
flag:3
cards with a green flag
flag:4
cards with a blue flag
flag:5
cards with a pink flag
flag:6
cards with a turquoise flag
flag:7
cards with a purple flag
Card properties
prop:ivl>=10
cards with interval of 10 days or more
prop:due=1
cards due tomorrow
prop:due=-1
cards due yesterday that haven’t been answered yet
prop:due>-1 prop:due<1
cards due between yesterday and tomorrow
prop:reps<10
cards that have been answered less than 10 times
prop:lapses>3
cards that have moved into relearning more than 3 times
prop:ease!=2.5
cards easier or harder than default
Note that due only matches review cards and learning cards with an interval of a day or more: cards in learning with small intervals like 10 minutes are not included.
Recent Events
Added
added:1
cards added today
added:7
cards added in last week
The check is made against card creation time rather than note creation time, so cards that were generated within the time frame will be included even if their notes were added a long time ago.
Edited
edited:n
cards where the note text was added/edited in the last n days.
This requires Anki 2.1.28+ / AnkiMobile 2.0.64+.
Answered
rated:1
cards answered today
rated:1:2
cards answered Hard (2) today
rated:7:1
cards answered Again (1) over the last 7 days
rated:31:4
cards answered Easy (4) in the last month
Rating searches had been limited to 31 days before version 2.1.39.
First Answered
On version 2.1.45+, you can also search for the very first review only:
introduced:1
cards answered for the first time today
introduced:365
cards answered for the first time within the last 365 days
Matching special characters
This section was written for Anki 2.1.36+ - earlier versions did not support escaping characters in certain situations.
As shown in the previous section, some characters like *, _ and " have a
special meaning in Anki. If you need to locate those characters in a search,
you need to tell Anki not to treat them specially.
-
Space
To match something including spaces, enclose the"entire term"in double quotes. If it is a colon search, you also have the option to only quote thepart:"after the colon". -
",*and_
Add a backslash before these characters to treat them literally. For example,_will match any single character, but\_matches only an actual underscore. -
\
Because a backlash is used to remove the special meaning from other characters, it too is treated specially. If you need to search for an actual backslash, use\\instead of\. -
(and)
You can search for parentheses either by enclosing the full term in quotes, and/or by using a backslash. That is,"some(text)",some\(text\)and"some\(text\)"are all equivalent, butsome(text)is not. -
-
Starting a search term with-usually inverts it:-dogmatches everything except dog for example. If you instead wish to include an actual hyphen, you can either use a backslash, or include the text in quotes, such as\-.-or"-.-". -
:
Colons have to be escaped unless they are preceded by another, unescaped colon. Sow:e:bis a word boundary search fore:b,w\:e\:bsearches literally forw:e:bandw\:e:bsearches the fieldw:eforb(see field searches). -
&,<, and>
&,<, and>are treated as HTML when searching in Anki, and as such searches containing them don't work as expected. However, you can search for them by using their corresponding HTML entity names (&for&,<for<, and>for>). For example, searching<&text>searches for a card with<&text>in a field.
Raw input
Text preceded by certain keywords (like re:) will be treated as raw input. That is,
the characters listed above largely lose their special meaning. In such a context, only
a minimum of escaping is required to prevent ambiguity:
-
"must be escaped. -
Spaces and unescaped parentheses require the search term to be quoted.
-
The search term must not end in an odd number of backslashes.
Object IDs
nid:123
all cards of the note with note id 123
cid:123,456,789
all cards with card ids 123, 456 or 789
Note and card IDs can be found in the card info dialog in the browser. These searches may also be helpful when doing add-on development or otherwise working closely with the database.
Object IDs will not work in the mobile clients, and are not intended to be used in filtered decks at the moment.
Importing
Anki can import text files, packaged Anki decks created by the export feature, Mnemosyne 2.0 .db files, and SuperMemo .xml files. To import a file, click the File menu and then "Import".
Text Files
Any plain text file that contains fields separated by commas, semicolons or tabs can be imported into Anki, provided some conditions are met.
-
The files must be plain text (myfile.txt). Other formats like myfile.xls, myfile.rtf, myfile.doc must be saved as a plain text file first.
-
The files must be in UTF-8 format (see below).
-
Anki determines the number of fields in the file by looking at the first (non-commented) line. Any lines in the file which have a different number of fields will be ignored.
-
The first line also defines the separating character – if Anki finds a ';' on the first line it will use that, if it finds a comma it’ll use that, etc.
Fields in your text file can be mapped to any field in your notes, including the tags field. You can choose which field in the text file corresponds to which field in the note when you import.
When you import a text file, you can choose what deck to put the cards in. Keep in mind that if you have the deck override option set for one or more of your templates, the cards will go to that deck rather than the one you’ve selected.
This is an example of a valid file:
foo bar; bar baz; baz quux
apple; banana; grape
There are two ways to include newlines in fields.
Escape the multi-lines by placing the contents of the field in quotation marks:
hello; "this is
a two line answer"
two; this is a one line one
Because quotes are used to mark where a field begins and ends, if you wish to include them inside your field, you need to replace a single doublequote with two doublequotes to "escape" them from the regular handling, like so:
field one;"field two with ""escaped quotes"" inside it"
When you use a spreadsheet program like Libreoffice to create the CSV file for you, it will automatically take care of escaping double quotes.
Use HTML new lines:
hello; this is<br>a two line answer
two; this is a one line one
You need to turn on the "allow HTML in fields" checkbox in the import dialog for HTML newlines to work.
Escaped multi-lines will not work correctly if you are using cloze deletions that span multiple lines. In this case, please use HTML newlines instead.
You can also include tags in another field and select it as a tags field in the import dialog:
first field; second field; tags
This is an example of a valid file where the first line is ignored (#):
# this is a comment and is ignored
foo bar; bar baz; baz quux
field1; field2; field3
Spreadsheets and UTF-8
If you have non-Latin characters in your file (such as accents, Japanese and so on), Anki expects files to be saved in a 'UTF-8 encoding'. The easiest way to do this is to use the free LibreOffice spreadsheet program instead of Excel to edit your file, as it supports UTF-8 easily, and also exports multi-line content properly, unlike Excel. If you wish to keep using Excel, please see this forum post for more information.
To save your spreadsheet to a file Anki can read with LibreOffice, go to File>Save As, and then select CSV for the type of file. After accepting the default options, LibreOffice will save the file and you can then import the saved file into Anki.
HTML
Anki can treat text imported from text files as HTML (the language used for web pages). This means that text with bold, italics and other formatting can be exported to a text file and imported again. If you want to include HTML formatting, you can check the "allow HTML in fields" checkbox when importing. You may wish to turn this off if you’re trying to import cards whose content contains angle brackets or other HTML syntax.
If you wish to use HTML for formatting your file but also wish to include angle brackets or ampersands, you may use the following replacements:
| Character | Replacement |
|---|---|
| < | < |
| > | > |
| & | & |
Importing Media
If you want to include audio and pictures from a text file import, copy the files into the collection.media folder. Do not put subdirectories in the media folder, or some features will not work.
After you’ve copied the files, change one of the fields in your text file as follows.
<img src="myimage.jpg">
or
[sound:myaudio.mp3]
Alternatively, you can use the find and replace feature in the browse screen to update all the fields at once. If each field contains text like "myaudio", and you wish to make it play a sound, you’d search for (.*) and replace it with "[sound:\1.mp3]", with the 'regular expressions' option enabled.
When importing a text file with these references, you must make sure to enable the "Allow HTML" option.
You might be tempted to do this in a template, like:
<img src="{{field name}}">
Anki doesn’t support this for two reasons: searching for used media is expensive, as each card has to be rendered, and such functionality isn’t obvious to shared deck users. Please use the find & replace technique instead.
Bulk Media
Another option for importing large amounts of media at once is to use the media import add-on. This add-on will automatically create notes for all files in a folder you select, with the filenames on the front (minus the file extension, so if you have a file named apple.jpg, the front would say 'apple') and the images or audio on the back. If you would like a different arrangement of media and filenames, you can change the note type of the created cards afterwards.
Adding Tags
If you want to add 'tag1' and 'tag2' to every line you’re importing, add the following to the top of the text file:
tags:tag1 tag2
Duplicates and Updating
When importing text files, Anki uses the first field to determine if a note is unique. By default, if the file you are importing has a first field that matches one of the existing notes in your collection and that existing note is the same type as the type you’re importing, the existing note’s other fields will be updated based on content of the imported file. A drop-down box in the import screen allows you to change this behaviour, to either ignore duplicates completely, or import them as new notes instead of updating existing ones.
The duplicate check is done for your 'entire collection', not just in the current deck. If Anki is indicating that notes have not changed when you expected them to be imported, please check that the notes are not already in your collection somewhere.
If you have updating turned on and older versions of the notes you’re importing are already in your collection, they will be updated in place (in their current decks) rather than being moved to the deck you have set in the import dialog. If notes are updated in place, the existing scheduling information on all their cards will be preserved.
For info on how duplicates are handled in .apkg files, please see the Deck Packages section.
Экспортирование
Exporting allows you to save part of your collection as a text file or packaged Anki deck. To export, click the File menu and choose 'Export'.
Text Files
If you choose "Notes in Plain Text", Anki will write the contents of the notes into a text file. Each field is separated by a tab. If you edit the resulting file and don't modify the first field, you can later import that file back into Anki and Anki will update your notes based on your edits, provided you import back into the same note type.
If you find yourself needing to edit the first field as well, you'll need to change the format of your note type so that the first field is an ID number rather than actual text. (You can install the Add note id add-on to make this easier.)
In order for formatting to be preserved when you import text back in, the text is exported with all the HTML formatting embedded in it.
Packaged Decks
A 'packaged deck' consists of cards, notes, note types, and any sounds or images bundled up into a file ending with .apkg or .colpkg. You can use packaged decks to transfer cards between people, or for backing up parts of your collection.
There are two different kinds of packaged decks.
Collection (.colpkg)
When you export all decks with scheduling included, this is called a 'collection package'. Anki will copy your entire collection into a file ending in .colpkg, and place it on your desktop. A collection package is used to back up your collection, or copy it to another device.
Collection packages created with previous versions of Anki were called collection.apkg.
When this file is later imported, Anki will delete all the current cards in the collection, and replace the collection with the items in the file. This is useful for copying your collection back and forth between devices.
Existing media in your collection is not deleted when you import a collection package. To delete unused media, use Tools>Check Media.
Deck (.apkg)
Deck packages contain a single deck (and any child decks it may have). They have a filename ending with .apkg, but a filename other than collection.apkg. When you import a deck package, Anki will add the contents into your collection, rather than overwriting your collection.
If some notes in the deck package have previously been imported, Anki will keep the version with the most recent modification time. So if you download an updated deck, the edits that have been made in the updated version will be made in your collection as well, but if you re-import an unchanged deck after making edits in your collection, the changes in your collection will be kept.
If you choose not to include scheduling information, Anki will assume that you are sharing the deck with other people, and will remove marked and leech tags so that they will have a clean copy of it.
Managing Files and Your Collection
- Checking Your Collection
- File Locations
- Startup Options
- DropBox and File Syncing
- Network Filesystems
- Running from a Flash Drive
- Backups
- Inaccessible Harddisk
- Permissions of Temp Folder
- Corrupt Collections
Checking Your Collection
It is a good idea to occasionally check your collection file for problems. You can do this via the Tools>Check Database menu item. Checking the database ensures the file has not been corrupted, rebuilds some internal structures, and optimizes the file.
When you check the database, your tag list is also rebuilt. When you delete individual decks or cards, Anki does not update the list of used tags, as it's inefficient to do so. If you want to clear old tags out from the list that are no longer in use, checking your database is the way to do it.
Please note that Anki will automatically optimize your collection once every 2 weeks. This optimization ensures the collection performs well, but it does not check for errors or rebuild the tag list when automatically optimizing.
File Locations
On Windows, the latest Anki versions store your Anki files in your
appdata folder. You can access it by opening the file manager, and
typing %APPDATA%\Anki2 in the location field. Older versions of Anki
stored your Anki files in a folder called Anki in your Documents
folder.
On Mac computers, recent Anki versions store all their files in the
~/Library/Application Support/Anki2 folder. The Library folder is
hidden by default, but can be revealed in Finder by holding down the
option key while clicking on the Go menu. If you're on an older Anki
version, your Anki files will be in your Documents/Anki folder.
On Linux, recent Anki versions store your data in
~/.local/share/Anki2, or $XDG_DATA_HOME/Anki2 if you have set a
custom data path. Older versions of Anki stored your files in
~/Documents/Anki or ~/Anki.
Within the Anki folder, the program-level and profile-level preferences are stored in a file called prefs.db.
There is also a separate folder for each profile. The folder contains:
-
Your notes, decks, cards and so on in a file called collection.anki2
-
Your audio and images in a collection.media folder
-
A backups folder
-
Some system files
You should never copy or move your collection while Anki is open. Doing so could cause your collection to become corrupt. Please do not move or modify the other files in the folder either.
Startup Options
If you have made a destructive change on one computer and have an undamaged copy on another computer, you may wish to start Anki without syncing in order to use the full sync option without first downloading the changes. Similarly, if you are experiencing problems with Anki, you might want to (or might be instructed to) disable add-ons temporarily to see if one might be causing the problem. You can do both of these things by holding down the Shift key while starting Anki.
It is possible to specify a custom folder location during startup. This is an advanced feature that is primarily intended to be used with portable installations, and we recommend you use the default location in most circumstances.
The syntax to specify an alternate folder is as follows:
anki -b /path/to/anki/folder
-
If you have multiple profiles, you can pass -p <name> to load a specific profile.
-
To change the interface language, use -l <iso 639-1 language code>, such as "-l ja" for Japanese.
If you always want to use a custom folder location, you can modify your shortcut to Anki. On Windows, right-click on the shortcut, choose Properties, select the Shortcut tab, and add "-b \path\to\data\folder" after the path to the program, which should leave you with something like
"C:\Program Files\Anki\anki.exe" -b "C:\AnkiDataFolder"
You can also use this technique with the -l option to easily use Anki in different languages.
On Windows, you should use a backslash (\) not a forward slash (/).
On a Mac there is no easy way to alter the behaviour when clicking on the Anki icon, but it is possible to start Anki with a custom base folder from a terminal:
open /Applications/Anki.app --args -b ~/myankifolder
Alternatively, you can define the environment variable "ANKI_BASE". On Windows, you can define the environment variable with:
set "ANKI_BASE=C:/path/to/AnkiDataFolder"
On Linux and macOS, you can use:
export ANKI_BASE="/path/to/AnkiDataFolder"
DropBox and File Syncing
We do not recommend you sync your Anki folder directly with a third-party synchronization service, as it can lead to database corruption when files are synced while in use.
If you just want to synchronize your media, you can link external folders into services like DropBox. Please see DropboxWiki: Sync Folders Outside Dropbox (archive.org) for more info.
If you wish to keep your collection in sync as well, it is strongly recommended that you create a script that copies your files from your synced folder to a local folder, launches Anki, and then copies the files back when Anki is closed. This will ensure that the files are never synchronized while they are open.
Network Filesystems
We strongly recommend you have Anki store your files on a local hard disk, as network filesystems can lead to database corruption. If a network filesystem is your only option, regular use of Tools>Check Database to detect corruption is recommended.
Running from a Flash Drive
On Windows, Anki can be installed on a USB / flash drive and run as a portable application. The following example assumes your USB drive is drive G.
-
Copy the \Program Files\Anki folder to the flash drive, so you have a folder like G:\Anki.
-
Create a text file called G:\anki.bat with the following text:
g:\anki\anki.exe -b g:\ankidata
If you would like to prevent the black command prompt window from remaining open, you can instead use:
start /b g:\anki\anki.exe -b g:\ankidata
- Double-clicking on anki.bat should start Anki with the user data stored in G:\ankidata.
The full path including drive letter is required - if you try using
\anki\anki.exe instead you will find syncing stops working.
Media syncing with AnkiWeb may not work if your flash drive is formatted as FAT32. Please format the drive as NTFS to ensure media syncs correctly.
Backups
Each time your collection is closed (when closing Anki, switching profiles, or synchronizing your deck), Anki exports your collection into the backups folder. By default Anki will store up to 30 backups; you can adjust this in the preferences.
Automatic backups do not protect against disk or computer failure, and do not extend to your media. To keep your collections safe, please consider making manual backups too.
The easiest way to make a manual backup is to use the File>Export menu item to export all decks with scheduling and media information included, which will save your data to a .colpkg file.
If you want to back up multiple profiles and your add-ons as well, you can make a complete copy of your Anki folder. Please make sure you close Anki first, as backups may be corrupt, if they are run while Anki is open.
To restore from an automatic backup:
-
From the File menu, select Switch Profile to show the Profiles window.
-
Select the profile you wish to restore on the left.
-
Click the Open Backup… button.
-
Choose Yes and the available backups will appear.
-
Open a backup based on the date you wish to restore to.
-
Check that that the backup that was restored was the one you intended. If you wish to try a different backup, return to step 1.
-
Anki has disabled automatic syncing and backups while you check the backup. When you're happy with the backup you've selected, quit Anki and start it again to return to the normal behaviour.
Anki also logs deleted notes to a text file called deleted.txt in your profile folder. These notes are in a text format that can be read by File>Import, though please note the import feature only supports a single note type at one time, so if you have deleted notes from different note types, you'll need to split the file into separate files for each note type first.
Inaccessible Harddisk
If Anki can't write to files in the Anki folder, a message will be displayed on startup saying that Anki can't write to the harddisk, and Anki will close. If you're unsure how to fix the permissions, please contact someone near you who is knowledgeable about computers and can help you out.
Permissions of Temp Folder
Anki uses the system's temporary folder to store temporary data. If the permissions of this folder have been changed from the default settings by a rogue app or buggy antivirus app, Anki will not function properly.
If you're on a Windows 7 machine, the general steps to fix the problem are listed below. As this is somewhat complicated, please ask someone knowledgeable about Windows if you are not sure.
-
Click on the start bar, and type in %temp% (including the percents), then hit Enter.
-
Go up one folder, and locate the temp folder. Right click on it, and choose Properties.
-
In the security tab, click on Advanced.
-
Click on the Owner tab. If you're not listed as the owner, click the button to take ownership.
-
On the permissions tab, ensure that you have full control. On a default W7 install the control will actually be inherited from c:\users\your-username.
Corrupt Collections
Anki uses a file format that is robust against program and computer crashes, but it's still possible for your collection to become corrupt if the files are modified while Anki is open, stored on a network drive, or corrupted by a bug.
When you run Tools>Check Database, you will receive a message if Anki detects the file has been corrupted. The best way to recover from this is to restore from the most recent automatic backup, but if your backup is too old, then you can attempt to repair the corruption instead.
On Linux, make sure sqlite3 is installed. On a Mac, it should be installed already. On Windows, download http://www.sqlite.org/sqlite-3_6_23.zip.
Next, create a backup of your collection.anki2 file, in case something goes wrong with the steps below.
Linux/macOS
Open a terminal, change to the folder your collection is located in, and type:
sqlite3 collection.anki2 .dump > dump.txt
Open the resulting dump.txt file in a text editor, and look at the final line. If it reads "rollback;", change it to "commit;"
Then run the following in a terminal:
cat dump.txt | sqlite3 temp.file
Make sure you use temp.file - do not put collection.anki2 on the right, or you will blank out the file. When you're done, proceed to the final step.
Windows
Copy the sqlite3.exe program and your deck to your desktop. Then go to
Start>Run and type in cmd.exe.
If you're on a recent Windows, the command prompt may not start on your desktop. If you don't see desktop displayed in the command prompt, type something like the following, replacing 'administrator' with your login name.
cd C:\Users\Administrator\Desktop
Then type:
sqlite3 collection.anki2 .dump > dump.txt
Open the resulting dump.txt file in a text editor, and look at the final line. If it reads "rollback;", change it to "commit;"
Then run the following in a terminal:
type dump.txt | sqlite3 temp.file
Make sure you use temp.file - do not put collection.anki2 on the right, or you will blank out the file. When you're done, proceed to the final step.
Final Step
Check that you didn't get an error message, and that temp.file is not empty. The procedure optimizes the collection in the process, so it's normal for the new file to be somewhat smaller than the old one.
When you've confirmed the file is not empty:
-
rename the original collection.anki2 file to something else
-
rename temp.file to collection.anki2
-
move collection.anki2 back into your collection folder, overwriting the old version
-
start Anki and go to Tools>Check Database to make sure the collection has been successfully restored.
Graphs and Statistics
Card Info
You can display information about a card by using the Cards>Info menu item, by right-clicking on the card and then selecting Info, or by pressing I on the review screen. Most of the displayed information should be self-explanatory. A few notes:
Position
Only shown when the card is new, it shows the order the card will appear
in relative to other new cards. The position can be changed in the
browser.
Interval
The delay from one review to the next. Times are abbreviated; "0s, 1m,
3h, 4d, 5mo, 6y" refers to seconds, minutes, hours, days, months and
years respectively.
Ease
The approximate amount the interval will grow when you answer a review
card with the "Good" button.
Statistics
The statistics window is accessed by clicking on Stats button at the top of the main window, or by pressing T. The statistics window will show statistics from the currently selected deck and any subdecks. If you select the checkbox "collection" at the top, statistics will be shown for your entire collection instead. You can also display graphs for arbitrary searches by adding filters in the search box at the top (2.1.28+).
(Anki 2.1.28+ introduced redesigned graphs. The old graphs are currently still accessible with a Shift-click on the Stats button.)
By default, Anki 2.1.28+ will show you statistics for the last 12 months. You can change this to all history scope or deck life scope at the top. (The "today" section at the top remains of course unaffected by this selection.)
Older versions of Anki will by default show you statistics for the previous month. You can change this to a year scope or deck life scope at the bottom. (Again, the “today” section at the top is unaffected by this selection.)
Clicking on "Save PDF" at the bottom will save a PDF document of the statistics to a file on your desktop to make it easy to share your statistics with others.
When you delete notes, their review history is maintained in Anki. It will not be included when looking at statistics for a specific deck (as Anki has no way of knowing which deck the deleted cards belonged to), but will be included when you look at statistics for the whole collection.
Types of Cards
The stats window uses some terms that you may not be familiar with:
Mature
A mature card is one that has an interval of 21 days or greater.
Young
A young card is one that has an interval of less than 21 days, but is
not in learning.
Learn
A learning card is one that is still in learning mode (using whatever
steps may be defined in the deck’s options).
Relearn
A relearning card is a card that you have failed in review mode, thus
returning it to learning mode to be relearned.
Unseen
An unseen card is one that has been added to your collection but has not
yet entered learning mode. Unseen cards are sometimes referred to as
"new" cards, especially when they are in the "new" queue to be shown for
the first time.
Today
At the top of the statistics window is a brief list of textual statistics about the reviews that you have completed today. A “review” in this context is 'one answering of a card', so a card might count as multiple reviews if it needed to be seen multiple times, and a learning card answered also counts as a “review.” A couple of the stats whose meaning may not be immediately obvious:
Again Count
This is the number of reviews that you have failed (i.e., pressed Again
on). The correct percentage listed afterwards is the number of cards you
did 'not' fail divided by the total number of cards you studied.
Learn, Review, Relearn, Filtered
The number of reviews that were learning cards, review cards, relearning
cards, or studied in a filtered deck when not due.
The stats for the current day are not a good overall indicator of your learning progress; everyone has bad days and good days, and seeing that you got a lower percentage correct on a particular day should not be cause for concern. The remainder of the stats, which take longer periods of time into account, will give more useful information if you wish to try to change your study habits or scheduling settings based on your performance.
The “today” statistics are unaffected by the time period selected at the bottom of the window.
The Graphs
Future Due
This graph shows an estimated number of reviews that will be due on a
given day in the future if you learn no new cards and fail no cards. The
bars and the left axis show the number of cards due on each day if you
study all cards each day, while the line and the right axis show the
number of cards due on that day if you don’t study at all until then.
Note that the forecast graph does not count reviews that are currently
overdue, so if you have a large backlog, the overdue cards will not be
displayed.
Reviews
This graph counts the number of card reviews you have done. The bars may
correspond to days, weeks, or months, depending on the time period
you’ve selected at the bottom of the screen. The differently colored
blocks show how many of the cards you answered on each day were
mature, young, relearning, or learning cards.
There is also a separate group for cards answered in a filtered/cram
deck while they were not due. The line and the right axis shows the
cumulative total for each type of review as time progresses across the
graph (so at 0 days, it would display the number for the entire time
period displayed on the graph).
Card Counts
This pie chart shows what percentage of your deck or collection consists
of mature, unseen, young/learn, and suspended cards. If you wish to
calculate a more precise percentage, the key shows the exact number of
cards in each section, and the total number of cards is displayed to the
side.
Review Time
This graph works exactly like Review Count, except that it deals with
the amount of time you spent on each card rather than the number of
cards answered.
Review Intervals
This graph displays the number of cards that have a given interval (the
delay between two reviews). The line and the right axis tell you what
percentage of your cards have an interval of less than or equal to the
time below that point. The time scope has a different effect on this
graph than other graphs: rather than changing which cards or period of
studying is included, it limits how far out the intervals are displayed
to (so 14-month intervals are not displayed at all on a 1-year graph).
Hourly Breakdown
This graph shows what percentage of total reviews you have passed (i.e.,
not pressed Again on) during given hours. The larger, darker bars and
left axis show the success rate; the thinner, lighter bars and right
axis show the number of reviews you’ve made at that hour (so you know
how significant the results are).
Answer Buttons
This graph shows how many times you’ve chosen the Again, Hard, Good, or
Easy button while studying learning/new, young, and
mature cards. Anki also displays the percentage
of correct reviews for each type of card.
Manual Analysis
If you’re interested in getting information from your statistics other than what Anki provides, it is possible to access the data directly. Because of the complexity involved, this is not something we can provide any support for.
One option is to write an add-on that adds another graph or more details to the statistics window. There are several add-ons of this sort on AnkiWeb already, which you can look at to get an idea of how it works.
A more powerful and more complex option is to extract the review log information directly from Anki’s database and analyze it in an external program. Anki uses a database format called SQLite. There are many tools available for working with SQLite databases; one of the easiest to start with is called SQLite Browser, which will allow you to look around the database as well as export a CSV version of tables for import into another program.
The most important table for statistics is the 'revlog' table, which stores an entry for each review that you conduct. The columns are as follows:
id
The time at which the review was conducted, as the number of
milliseconds that had passed since midnight UTC on January 1, 1970.
(This is sometimes known as 'Unix epoch time', especially when in
straight seconds instead of milliseconds.)
cid
The ID of the card that was reviewed. You can look up this value in the
id field of the 'cards' table to get more information about the card,
although note that the card could have changed between when the revlog
entry was recorded and when you are looking it up. It is also the
millisecond timestamp of the card’s creation time.
usn
This column is used to keep track of the sync state of reviews and
provides no useful information for analysis.
ease
Which button you pressed at the end of the review (1 for Again, 4 for
Easy).
ivl
The new interval that the card was pushed to after the review. Positive
values are in days; negative values are in seconds (for learning cards).
lastIvl
The interval the card had before the review. Cards introduced for the
first time have a last interval equal to the Again delay.
factor
The new ease factor of the card in permille (parts per thousand). If the
ease factor is 2500, the card’s interval will be multiplied by 2.5 the
next time you press Good.
time
The amount of time (in milliseconds) you spent on the question and
answer sides of the card before selecting an ease button.
type
This is 0 for learning cards, 1 for review cards, 2 for relearning cards,
and 3 for early "cram" cards (cards being studied in a filtered deck when they
are not due).
Media
Anki stores the sounds and images used in your notes in a folder next to the collection. For more on the folder location, please see the file locations section. When you add media within Anki, either by using the paperclip icon in the editor or by pasting it into a field, Anki will copy it from its original location into the media folder. This makes it easy to back up your collection’s media or move it to another computer.
If your media filenames contain spaces or other special characters such
as percentage signs, the way the filenames appear in the HTML editor will
differ from the way the filenames appear on disk. For example, a file called
hello 100%.jpg will appear as hello%20100%25.jpg in the HTML editor.
Internally, Anki still uses the original filenames, so if you would like to
search for the file or modify the filename with Find&Replace, you will
need to use the name as it appears on disk, not as it appears in the
HTML editor. Exporting to a text file is another way to see the underlying
representation.
Checking Media
You can use the Tools>Check Media menu option to scan your notes and
media folder. It will generate a report of files in the media folder
that are not used by any notes, and media referenced in notes but
missing from your media folder. It does not scan question or answer
templates, which is why you can’t place media references to fields in
the template. If you need a static image or sound on every card, name it
with a leading _ (e.g., \_dog.jpg) to tell Anki to ignore it when
checking for media. If you delete media using the unused media check,
Anki will move it into your operating system’s trash folder, so you can
recover if you accidentally delete media that shouldn’t have been
deleted.
Manually Adding Media
When you add media via Anki's interface, Anki takes care of ensuring the filenames are encoded in a way that should work across different devices, removing characters that won't work on certain operating systems, and truncating very long filenames.
If you manually add files to your media folder, you should use Tools>Check Media afterwards, to ensure the filenames are encoded correctly. If you skip this step, any filenames that are not compatible will be skipped when syncing.
Supported Formats
Anki uses a program called mpv (and mplayer as a fallback) in order to support sounds and videos. A wide variety of file formats are supported, but not all of these formats will work on AnkiWeb and the mobile clients. MP3 audio and MP4 video seems to be the most universally supported.
Math and Symbols
MathJax
MathJax is a modern, browser-based typesetting system, useful for mathematical and chemical equations. It does not require the installation of any extra software, so it is easy to use, and it is recommended for most users.
MathJax is supported out of the box on Anki 2.1+, AnkiMobile, and AnkiDroid 2.9+.
To try it out:
-
Type the following in a field:
\sqrt{x} -
Select the text you just typed.
-
Click the rightmost button in the editor, and choose "MathJax inline" from the menu. Anki will change the text so it reads:
\(\sqrt{x}\) -
If you click the Cards… button, you’ll see a preview of how the equation will appear when the card is reviewed.
Anki’s MathJax support expects content in TeX format. If you’re not
familiar with TeX formatting, please see this
cheatsheet.
Please note that point 2 does not apply in Anki - Anki uses \( and
\) for inline equations, and \[ and \] for display equations.
If you want to use newlines in a MathJax expression, please use Shift+Enter instead of just Enter, as a normal newline will prevent MathJax from working correctly.
Anki includes built in support for mhchem for rendering chemical equations. Please see the 'chemical equations' section and the following sections for more information: https://mhchem.github.io/MathJax-mhchem/
It is possible to customize some settings.
LaTeX
LaTeX is a powerful typesetting system, useful for entering mathematical formulas, chemical formulas, musical notation and so on. Anki provides some support for LaTeX, allowing you to enter LaTeX code in your notes. When you review a card, Anki will call LaTeX and display the generated image instead.
LaTeX is more work to set up, and images can only be generated with the computer version of Anki - though once generated, the images can be displayed by mobile clients. Because of the extra complexity LaTeX brings, it is only recommended for users that need more features than MathJax provides.
Assumed Knowledge
Anki’s LaTeX support is not turn-key: it is assumed that you know how to use LaTeX already, and that you have it installed. If you have no experience with LaTeX, please consult one of the many guides available on the internet. If you are having trouble with markup, please ask on a LaTeX forum.
To install LaTeX, on Windows use MiKTeX; on macOS use MacTex, and on Linux use your distro’s package manager. Dvipng must also be installed.
On Windows, go to Settings in MikTek’s maintenance window, and make sure "Install missing packages on the fly" is set to "No", not to "Ask me first". If you continue to have difficulties, one user reported that running Anki as an administrator until all the packages were fetched helped.
On macOS, LaTeX has only been tested with MacTex and BasicTex. If you use BasicTex, you need to install dvipng separately, with the following command:
sudo tlmgr update --self; sudo tlmgr install dvipng
The command may not be on the path, so you may need to provide the full path, eg /usr/local/texlive/2014basic/bin/x86_64-darwin/tlmgr.
If you are not using the above LaTeX packages, you will need to use the edit LaTeX add-on to specify the full path to latex and dvipng.
Web/Mobile
When you review a card with LaTeX on it, Anki will generate an image for that LaTeX and place the image in your collection’s media folder for future use. The web & mobile clients will display these images if they already exist, but can not generate the images on their own.
To avoid having to review all your cards at least once before you can study on the other clients, Anki can generate the images in bulk for you. To generate all the images, please go to Tools>Check Media. After that, syncing should upload the generated media to AnkiWeb and the other clients.
Example
The most general way to input LaTeX content is to surround it with [latex][/latex] tags. There’s a shortcut button for this documented in the editor section.
[latex] tags must be used inside a field - placing them in the card template will cause problems.
For example, entering the following on the front of an Anki flashcard:
Does [latex]\begin{math}\sum_{k = 1}^{\infty}\frac{1}{k}\end{math}[/latex] converge?
will produce this when the flashcard is viewed:
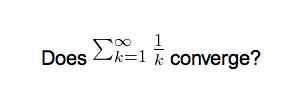
The formula in the example above is called a 'text formula', because it is displayed right within the non-mathematical text. In contrast, the following example shows a 'displayed formula':
Does the sum below converge?

[latex]\begin{displaymath}\sum_{k = 1}^{\infty}\frac{1}{k}\end{displaymath}[/latex]
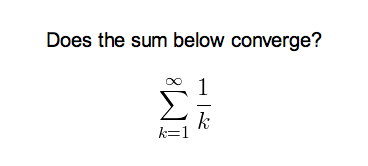
'Text formulas' and 'display formulas' are the most common type of LaTeX expressions, so Anki provides abbreviated versions of them. Expressions of the form:
[latex]\begin{math}...\end{math}[/latex]
can be shortened to
[$]...[/$]
and expressions of the form
[latex]\begin{displaymath}...\end{displaymath}[/latex]
can be shortened to
[$$]...[/$$]
For example, the two LaTeX snippets shown before are equivalent to
Does [$]\sum_{k = 1}^{\infty}\frac{1}{k}[/$] converge?
and
Does the sum below converge?

[$$]\sum_{k = 1}^{\infty}\frac{1}{k}[/$$]
respectively.
Packages
Anki allows you to customize the LaTeX preamble so you can import custom packages for chemistry, music and so on. For example, imagine you find an example file for chemtex on the internet:
\documentclass[a4paper,12pt]{report}
\usepackage{chemtex}
\begin{document}

\initial
\begin{figure}[h]\centering
\parbox{.3\textwidth}{\ethene{H}{H$_3$C}{CH$_3$}{Br}}
\hfil
\parbox{.3\textwidth}{\cbranch{H}{S}{H}{S}{C}{S}{}{S}{H}
  \xi=-200 \cright{}{Q}{C}{D}{O}{S}{OH}}
\hfil
\parbox{.3\textwidth}{\hetisix{Q}{Q}{Q}{Q}{Q}{Q}{O}{Q}{O}
  \xi=-171 \fuseup{Q}{Q}{Q}{Q}{D}{Q}{D}{Q}{D}}
\caption{Chemie mit {\tt CHEMTEX}\label{a1}}
\end{figure}

\end{document}
Firstly, follow the documentation of the package and MiKTeX/MacTex in order to install the package. To check the package is working, you’ll want to put code like the above into a .latex file and test if you can compile it from the command line. Once you’ve confirmed that the package is available and working, we can integrate it with Anki.
To use the package with Anki, click "Add" in the main window, then click the note type selection button. Click the "Manage" button, then select the note type you plan to use and click "Options". The LaTeX header and footer are shown. The header will look something like:
\documentclass[12pt]{article}
\special{papersize=3in,5in}
\usepackage{amssymb,amsmath}
\pagestyle{empty}
\setlength{\parindent}{0in}
\begin{document}
To use chemtex, you’d add the usepackage line in the earlier example, so it looks like:
\documentclass[12pt]{article}
\special{papersize=3in,5in}
\usepackage{amssymb,amsmath}
\usepackage{chemtex}
\pagestyle{empty}
\setlength{\parindent}{0in}
\begin{document}
After that, you should be able to include lines like the following in your Anki cards:
[latex]\ethene{H}{H$_3$C}{CH$_3$}{Br}[/latex]
Template Conflicts
As of Anki 2.1.20 / AnkiMobile 2.0.56 / AnkiDroid 2.13, this workaround is no
longer required, as {{field}} text inside fields no longer causes problems. If
you need to support older versions and want to keep using this syntax, please
make sure you place the {{=<% %>=}} string at the very top of your front and
back template, as recent Anki versions will not recognize it anywhere but the
start.
For older versions:
It’s not uncommon for {{ and }} to pop up in LaTeX code when writing mathematical equations. To ensure that your LaTeX equations don’t conflict with Anki’s field replacements, it’s possible to change the separator to something else.
For example, if you have a template:
{{latex field}}
Changing it to the following will make it unlikely that the LaTeX will conflict:
{{=<% %>=}}
<%latex field%>
Cloze Conflicts
Cloze deletions are terminated with }}, which can conflict with a }}
appearing in your LaTeX. To prevent LaTeX from being interpreted as a closing
cloze marker, you can put a space between any double closing braces that do not
indicate the end of the cloze, so
{{c1::[$]\frac{foo}{\frac{bar}{baz}}[/$] blah blah blah.}}
will not work, but
{{c1::[$]\frac{foo}{\frac{bar}{baz} }[/$] blah blah blah.}}
will (and LaTeX ignores spaces in math mode, so your equation will render the same). If you want to avoid adding the extra space into the rendered text (for example, when you are making Cloze cards for learning programming languages), another option is to use a HTML comment when editing the card in HTML mode:
{{c1::[$]\frac{foo}{\frac{bar}{baz}<!-- -->}[/$] blah blah blah.}}
You may use either workaround if you need to use the :: character
sequence within the Cloze-deleted text. The first card generated for the
following note text will read [type] in C++ is a type-safe union:
{{c1::std:<!-- -->:variant::~type~}} in C++ is a {{c2::type-safe union}}
Unsafe Commands
Anki prohibits certain commands like \input or \def from being used on cards or in templates, because allowing them could allow malicious shared decks to damage your system. (To be on the safe side, these commands are prohibited even in comments, so if you’re getting this error but don’t think you’ve used one, please double-check any comments you have in your headers, templates, and cards.) If you need to use these commands, please add them to a system package and import that package as described in the previous section.
Leeches
Leeches are cards that you keep on forgetting. Because they require so many reviews, they take up a lot more of your time than other cards.
Anki can help you identify leeches. Each time a review card 'lapses' (is failed while it is review mode), a counter is increased. When that counter reaches 8, the note is tagged as a leech, and the card is suspended. The threshold, and whether to suspend or not, can be adjusted in the deck options.
Anki will continue to issue leech warnings periodically for a difficult card. The warning interval is half the initial leech threshold. That is, if you have Anki configured to warn at 8 lapses, future warnings will happen every 4 lapses. (12, 16, etc)
Once a leech is found, there are a number of ways you can handle it.
Waiting
Some leeches are caused by 'interference'. For example, an English learner may have recently learnt the words "disappoint" and "disappear". As they look similar, the learner may find themselves confusing the two when trying to answer. In these situations, it’s often productive to concentrate on just one idea. When that idea is firmly ingrained in your mind, you can then return to learning the other idea. So in these situations, you may want to leave one of the words suspended until you have learnt the other one well, and then unsuspend it in the browser.
Deleting
Another way to manage leeches is to delete them. Consider if the material you’re struggling with is important enough to make it worth your while. By selectively deleting difficult and obscure items, you can dedicate more time to learning other material, and studying becomes a lot more fun.
Editing
Another approach is to change the way the information is presented. Perhaps the cards you have created have too much information on them, or perhaps you’re trying to memorize something without fully understanding it. Sometimes spending some time changing the way the card is phrased can help. It’s also a good time to think about making a mnemonic to help you remember.
Дополнения (Add-ons)
Возможности Anki могут быть расширены использованием дополнений. Дополнения могут предоставлять дополнительные возможности, такие как: поддержка определённых языков, расширенный контроль над расписанием и т.д.
Чтобы посмотреть список доступных дополнений, выберите в меню Инструменты –> Дополнения, затем нажмите на «Загрузить дополнения…» и «Посмотреть дополнения».
Если вы скачали дополнение, которое работает некорректно, или вы сделали ошибку при редактировании дополнения, вы можете использовать опцию «Удалить» чтобы удалить его.
Дополнения используют и изменяют произвольные части кодовой базы Anki, поэтому иногда обновление Anki может нарушить совместимость со старыми дополнениями. Если одно из ваших дополнений перестаёт работать после обновления Anki, пожалуйста, сообщите об этой проблеме автору дополнения. Если вам необходимо это дополнение, вам нужно продолжить использование старой версии Anki до тех пор, пока дополнение не получит обновление.
На большинстве страниц дополнений в Ankiweb есть кнопка «Contact Author», и многие авторы включают адрес своей почты внутрь дополнения, если вам необходимо связаться с автором, попробуйте открыть файл дополнения на редактирование и посмотреть в начале файла.
Чтобы узнать, как написать своё собственное дополнение, пожалуйста, посмотрите руководство по созданию дополнений (англ.)
Miscellanea
Menu Shortcuts
On Windows/Linux you can hold down the Alt key and press a highlighted letter to activate a particular menu.
Although macOS doesn’t support this feature, it does allow you instead to assign shortcuts to specific menu items. Please see http://lifehacker.com/343328/create-a-keyboard-shortcut-for-any-menu-action-in-any-program for more information.
Debug Console
Sometimes you may be asked to use the debug console to change a setting or check something. Unless asked to enter text in the "debug console", you will probably not need this. Advanced users may like to read more about it in the add-on writing guide.
When asked to enter text into the "debug console", please start Anki, and in the main window, press
Ctrl+Shift+;
(the control key, shift key, and semi-colon key at the same time)
On a Mac, press
Command+Shift+;
(the command key, shift key, and semi-colon key at the same time)
On some non-English keyboards, you may need to press : or + instead of ;.
In the window that has popped up, please paste the text you were asked to paste in the top section. When you’ve done so, please press Ctrl+Return (Command+Return on a Mac), and some text should appear in the bottom section. If you’ve been asked to paste the resulting output, please copy it from the bottom area, and paste it back to the support person.
If you press Ctrl+Shift+Return instead of just Ctrl+Return, Anki will try to print the result rather than doing what you asked it to. If you are getting unexpected errors, please make sure you’re not holding down the Shift key.
Contributing
Sharing Decks Publicly
To share decks with the general public, synchronize them with AnkiWeb, then log into AnkiWeb and click on "Share" from the menu next to the deck you wish to share.
If you shared a deck previously (including with previous versions of Anki), you can update it by clicking "Share" as above. Updating a shared deck will not reset the download counts or ratings. You can delete a shared deck that you have uploaded using the Delete button on the shared deck's page.
When updating a deck, AnkiWeb expects the deck to be at the same location as before. If you shared a deck when it was called "Korean Verbs" for example, and then renamed it to "Korean::Korean Verbs", resharing will not be able to update the existing copy. If you have forgotten the original name, you can guess it by downloading the deck on ankiweb and importing it (File > Import) in a new profile (File > Switch profile > Add). Then you can copy the exact name of the deck when it was first shared. If this doesn't work, please contact support.
When you update a shared deck, users who downloaded the deck previously will not automatically receive updates. If they download the deck again and re-import it, newly added material will be imported without altering their existing study progress, provided neither you nor the user has altered the note type since the first import.
Sharing Decks Privately
If you’d like to share decks with a limited group of people (such as a study group or class) rather than the general public, you can do so by sharing them outside of AnkiWeb.
To share a deck privately, go to the File menu and choose Export. Select a single deck (not "All Decks"), and turn off "include scheduling information". This will produce an .apkg file which you can share with others.
You can share the .apkg file by emailing it to people, placing it on a website or shared folder, or using a free file sharing service like Dropbox or Google Drive and sending people a link.
Both the computer version and mobile clients make it easy to import from an apkg file simply by clicking or tapping on it. AnkiWeb does not have the ability to import apkg files however, so the recipients of your deck will need to have the computer version or Anki on their mobile device.
When a user imports an .apkg file, cards that already exist in their collection will be ignored and any new cards will be added. As long as they use the same note type, modified cards will also be updated. To prevent data loss, cards that have been deleted in the new apkg file will not be deleted in the user’s collection, so if you need to delete cards from users' decks for whatever reason, you will need to contact them about it.
Sharing Add-ons
Please see https://addon-docs.ankiweb.net/sharing.html
Translating Anki
Please see https://translating.ankiweb.net
Contributing Code
Anki's source code is available at https://github.com/ankitects/anki
Before contributing, please see contributing.md.
Часто задаваемые вопросы
Please see https://faqs.ankiweb.net
Ресурсы
На сайте SuperMemo есть много полезной информации относительно интервальных повторений и памяти: http://www.supermemo.com/
Michael Nielsen has written a thorough piece about long term memory and how he uses Anki. He also provides a condensed version as a series of tweets.
Some medical students have banded together to make a paid-for guide focusing on the use of Anki in medical school: https://courses.ankipalace.com/
Soren Bjornstad has written a series of extensive articles about memory, SRS and how to use Anki effectively.